Create a Zap
Before the Zap Prepare for Integration
Before you continue, be sure to review the previous article in this series to learn: How to Prepare Your Segmentation Funnel for Zapier integration.Note: the integration attempt will fail at the testing stage if the Segmentation Funnel does not contain at least one lead.
Step 1: Make a Zap!
To start creating a Zap, click on Make a Zap!
Step 2: Name your Zap
It is always a good practice to provide a name to the Zap, which will help to differentiate from other Zaps.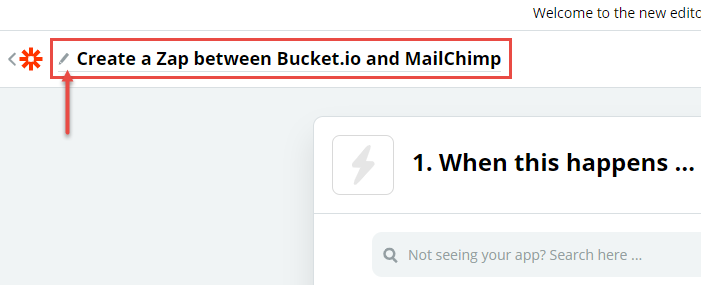
Step 3: Select Bucket.io
Once entered in the Zap configuration, look for Bucket.io in the search bar, and select the bucket.io logo.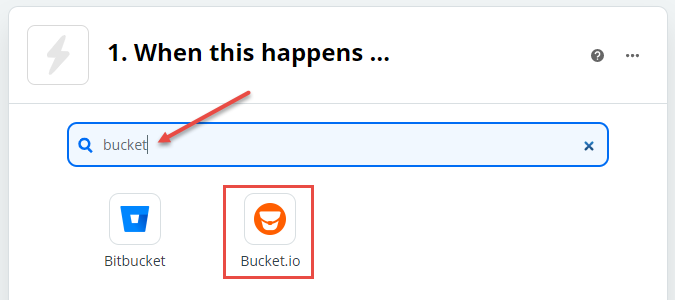
Step 4: Select a Trigger Event
After selecting bucket.io as the app for this Zap a Choose Trigger Event option will be displayed. In the drop-down select a New Segmentation or New Discover depending on the type of quiz created.
Click on Continue.
Step 5: Choose a Bucket.io Account
Click on Sign in to Bucket.io button.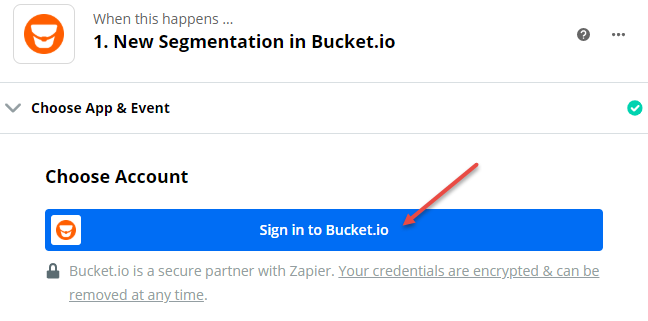
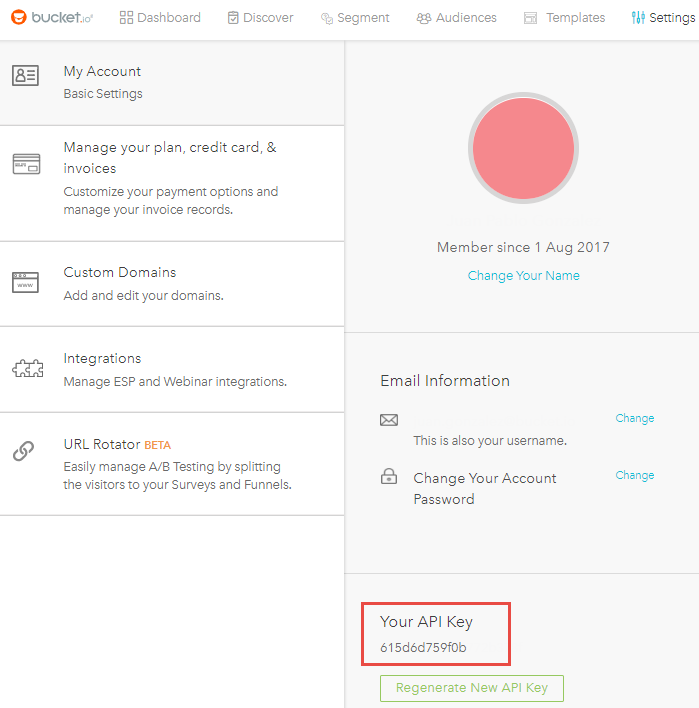
A new window will be displayed requesting the User API Key, this information can be found in the Account Settings in bucket.io

Copy the User API Key from the bucket.io account.
Click on Continue.
Step 6: Select the quiz
From the drop-down, select the name of the quiz for this Zap.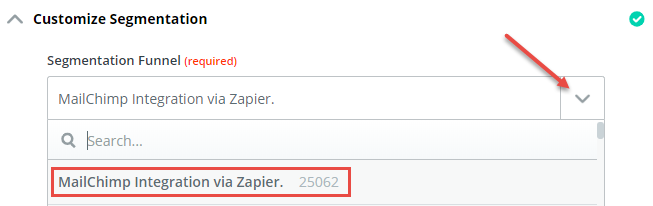
Click on Continue. Then Click on Test & Continue to test the connection with the quiz selected (Optional).
Step 7: Select Second app (ESP)
Search/Select the ESP or Second app where bucket.io will send the data collected in the bucket.io.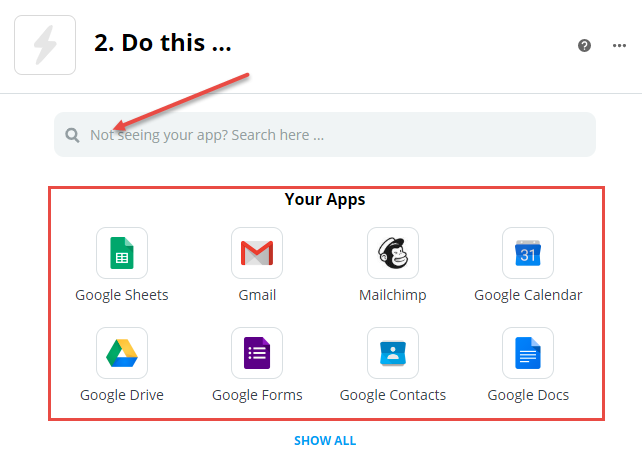
Step 8: Select an Action Event
Click on the Drop-Down and Select the Action Event for the Zap: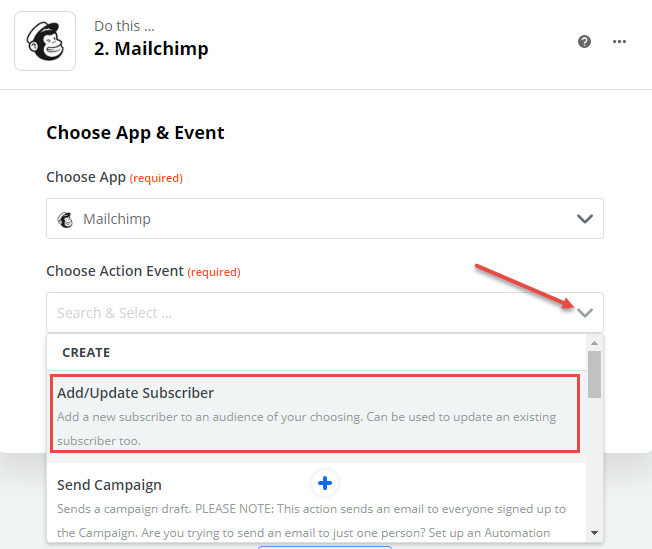
Then click on Continue.
Step 9: Log in to the Secondary app
Once the ESP or Secondary app is selected, Zapier request to login into the Secondary app in order to link it with the Zap. if the account is already linked with Zapier, please select it from the drop-down menu.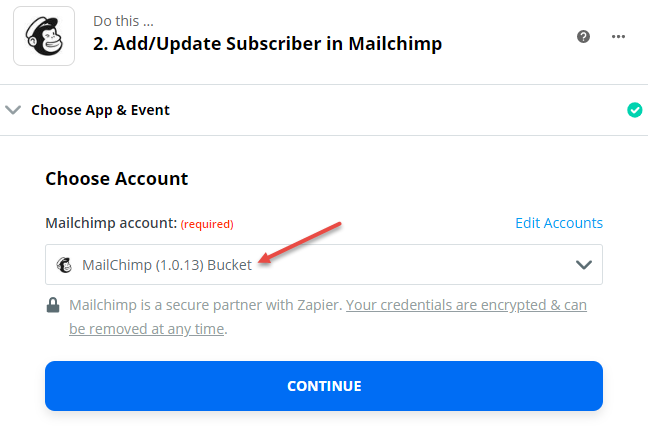
Then click on Continue.
Step 10: Configure the Zap
The option in the configuration may vary depending on the Secondary app selected. First click on the drop-down for the required field, there select the information from the Test Lead.
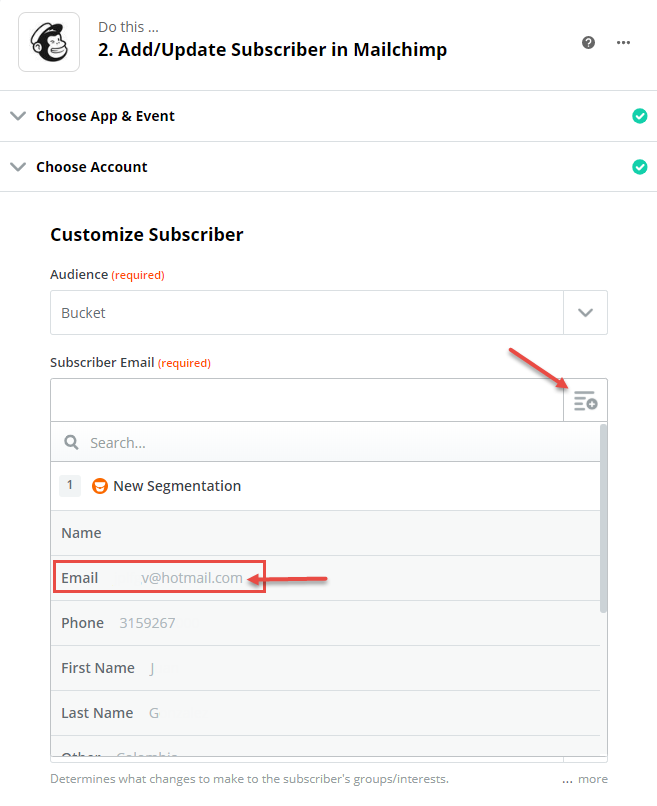
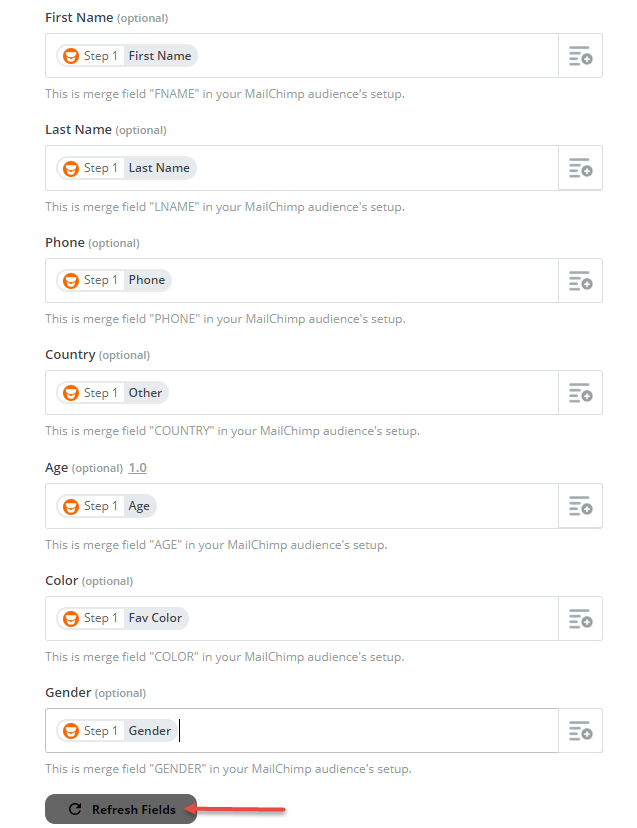
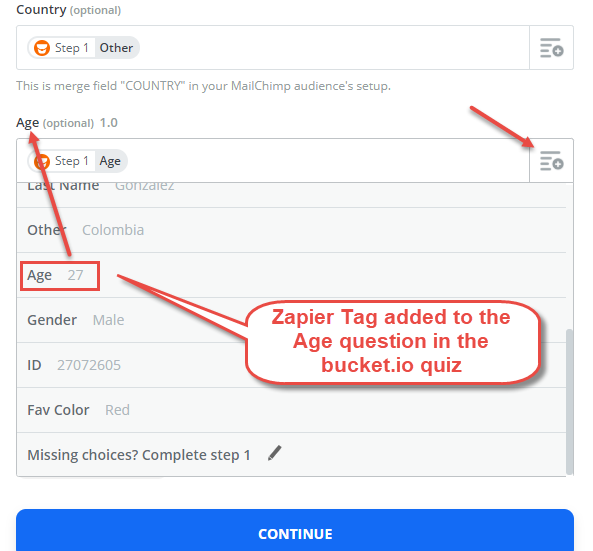
In order to link optional fields, please make sure to create the Customs Fields in the Secondary app first, so they can be displayed as optional fields in the Zap, if the Custom Fields are not created yet, take the time to create them and then click on the Refresh Fields button located at the bottom of the configuration (above the Continue button). Then use the drop-down menu for each Optional field to link the related data. Note that Zapier tags are needed in the quiz questions, so Zapier can grab the responses and show them as options in the drop-down menu for each optional field.
Then click on Continue.
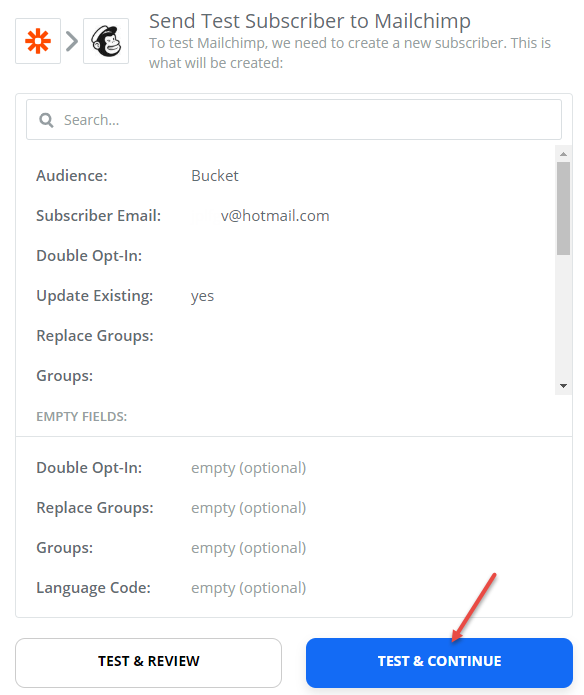
Step 11: Summary of the Zap
Once the configuration is finished zapier will display a summary of the data that will pass to create a test the Zap between bucket.io and teh Secondary app. Click on Test & Continue
Step12: Done!
After the Test, Zapier will show a "Test was successful!" message.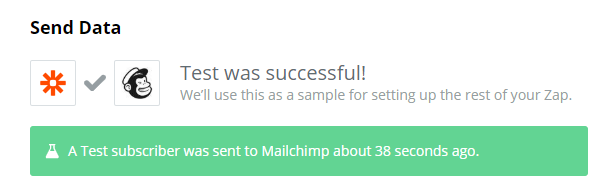
Click on End editing.
Now the Zap is ready to be Turned On
Related Articles
How to Create Outcomes
Step 1: Add an Outcome Page Click Outcome element from the left Or Drag & Drop the Outcome element from the left to the Drag and Drop Outcome section on the right. Step 2: Name Outcome Page. Once the Outcome is successfully added, a pop-up will be ...OLD - How to Create Outcomes
First you want to Login to your bucket.io account at www.bucket.io Go to “Segment” in the top navigation And get started by choosing create a Segmentation Funnel Choose the Segmentation Funnel Type you want to create from the options: Full Page ...How to Create an Outcome Page
Step 1: From the navigation bar, select Build. Step 2: Click the Outcomes button. Alternatively, you can drag and drop the Outcomes button to the "Drag & drop Outcomes" area to begin creating this page. Step 3: Click the Outcome Page radio button. ...How to Create a Lead Capture Page
Step 1: From the navigation bar, select Build. Step 2: Click the Lead Capture button. Alternatively, you can drag and drop the Lead Capture button to the "Drag & drop Lead Capture" area to begin creating this page. Step 3: Customize your Lead Capture ...How to Create a Welcome Page
Step 1: From the navigation bar, select Build. Step 2: Click the Welcome Page button. Alternatively, you can drag and drop the Welcome Page button to the "Drag & drop Welcome Page" area to begin creating this page. Step 3: Customize your Welcome ...