If you want to create a subfolder for V-consult email then tame your Outlook Inbox with Subfolders, Rules and Filters.
In Outlook, you can easily find and group messages if you sort them into subfolders, and you can even have Outlook do the sorting for you automatically. Another option is to apply formatting that stands out to messages that are important, with or without sub-folders.
In this tutorial, I'll show you how to use these tools and more to automatically keep your Outlook inbox clean and focused on the email messages that really matter to you.
Creating Subfolders
Subfolders are the key to staying organized in Outlook, and you can have subfolders of any of your main folders: for e-mail, calendars, contacts, and more. Creating a subfolder takes just a few clicks in either the Windows or Mac version.
In the list of folders on the left side, right-click the Inbox, then select New Folder from the pop-up menu.
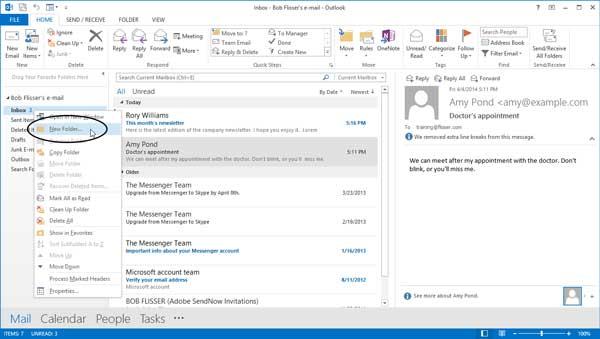
Right-click a folder to create a subfolder inside it
Type a name (v-Consult, if you want to store all the v-consult email in the subfolder), then press Enter. The new folder will be listed underneath the Inbox.

Subfolders are nested inside their parent folders
Now you can drag any messages you want into the new folder.
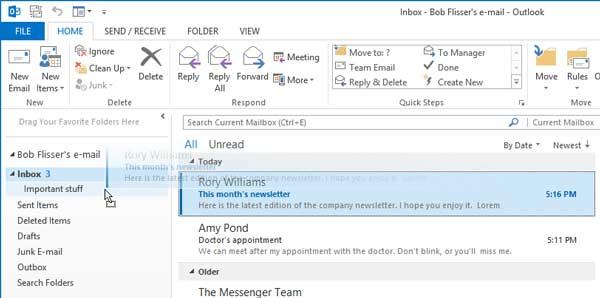
You can drag messages into subfolders
Tip: to select multiple messages to drag, Ctrl-click individual ones, or select a bunch in a row by clicking the first one you want, then Shift-click the last one.
After you drag, the message will be gone from the Inbox, and if you click the subfolder, you’ll see the message in it. Did you drag the wrong one by mistake? No problem! Drag it back out, again.
Also, if you’d prefer to copy the message rather than move it, hold down the Ctrl key while you drag.
And if you decide later that you don’t want that subfolder after all, you can right-click it and select Delete Folder from the pop-up menu. Any messages in the folder will be deleted, also.
Moving a Message Using a Quick Step or the Move Button
Two other ways of manually moving messages are the Quick Step feature (Windows only) or the Move button on the ribbon bar of both Windows and Mac versions. A Quick Step is sort of like a macro, and there are a few that come ready made with Outlook. In this case, we have to create our own for the new folder.
Creating and Using a Quick Step (Windows only)
First, let’s create a Quick Step: select a message that you want to move, then click the Down Arrow in the lower, right corner of the Quick Steps box.
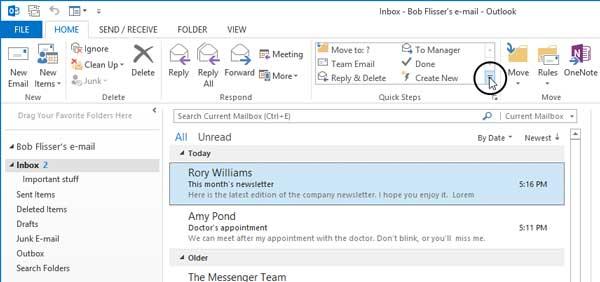
Click the lower Down Arrow in the Quick Steps box to create a new step
From the drop-down box, choose New Quick Step, then Move to Folder.
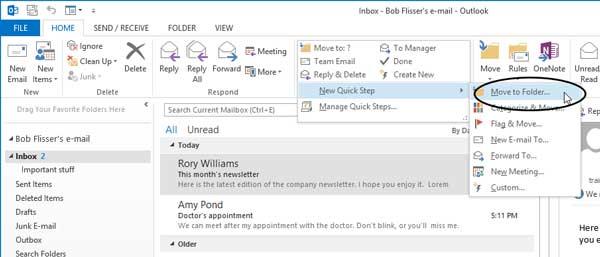
In the dialog box that appears, give it a meaningful name, choose the folder you want items moved to, then optionally mark messages as read. Then click Finish.
In the Quick

Step setup dialog, choose which folder to move messages to
To use it, select a message, then click the Quick Step you just created.
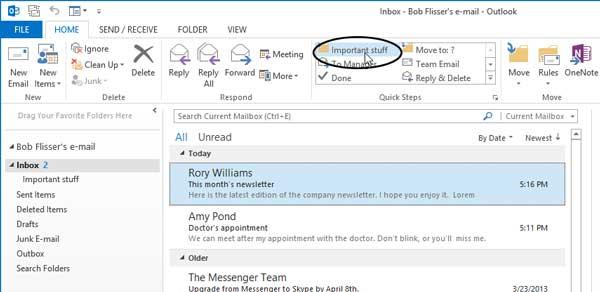
Quick Steps that you create will appear in the box on the Home tab
This moves the message, the same way as though you dragged it.
The Move Button (Windows and Mac)
Next to the Quick Step group on the ribbon is the Move button. When you create folders or move messages, it usually guesses that you’ll want to do it, again. It’s like a Quick Step that gets created automatically, but requires a couple of extra clicks to use.
Select a message, click the Move button, then from the menu, choose the folder from the list. If the folder you want isn’t listed, choose Other Folder. You can select the folder you want from a folder list.
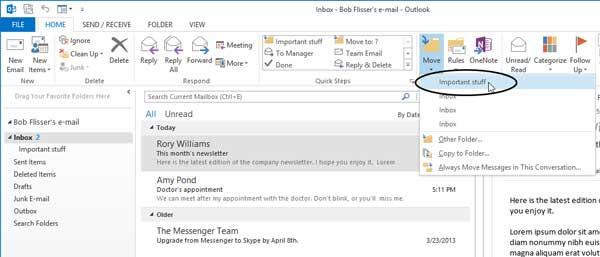
The Move button has some similar ways of moving messages
Although this works, I think it takes too many steps. There’s a much better way.
Creating Rules to Move Messages Automatically (If you have created a subfolder(v-Consult) then it is very important to move the messages automatically)
If you get a lot of messages, it can be easy to miss some of those that you want to put into subfolders. Fortunately, the Rules feature can do it for you, when messages arrive. You can create rules to move messages based on who the sender is, what the subject line is, whether you’re in the To or CC field, and many other criteria. As part of creating a rule, you can create a subfolder, so you don’t even have to do it in advance.
Creating a Rule From on a Message You Already Moved (Windows only)
In the Windows version, if you manually dragged a message into a subfolder, Outlook can create a rule to do it again, automatically.
Drag a message into a subfolder that you created. On the ribbon bar, click the Rules button, and notice the first two choices:
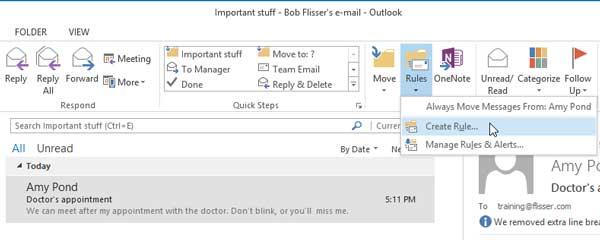
The Rules button has simple and advanced ways of defining rules
If you select Always Move Messages From… Outlook will always move messages from that sender into the currently selected subfolder. (If you do this then all the forms like patient registration, PPG, Carer registration form etc will move into V-consult subfolder, so skip this process)
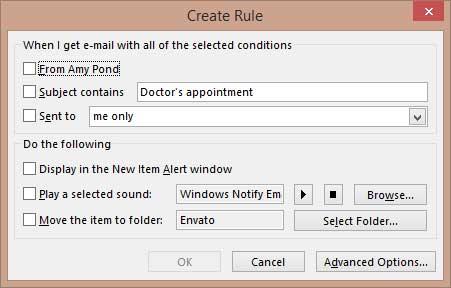
If you choose Create Rule, you’ll get a dialog box where you can choose additional settings, like whether to move messages based on the sender’s name, message subject, who it’s sent to, and more.
Please follow this process
Creating a Rule Using the Rules Wizard in Windows
The Rules Wizard has many more conditions for sorting messages and also lets you specify exceptions to the rules.
There are two ways of displaying the wizard. In the Create Rule dialog (see screen capture, above), you can click the Advanced Options button.
Another way is to click the Rules button and select Manage Rules & Alerts from the drop-down.
Think of a series of messages you often receive, like a particular newsletter, that always has some consistent words in the subject line. We’ll move the messages based on those words. You don’t have to select one of the messages to create this rule. You don’t even need any of them in your inbox. Outlook will grab them when they arrive.
In the Rules and Alerts dialog, click New Rule, at the top.
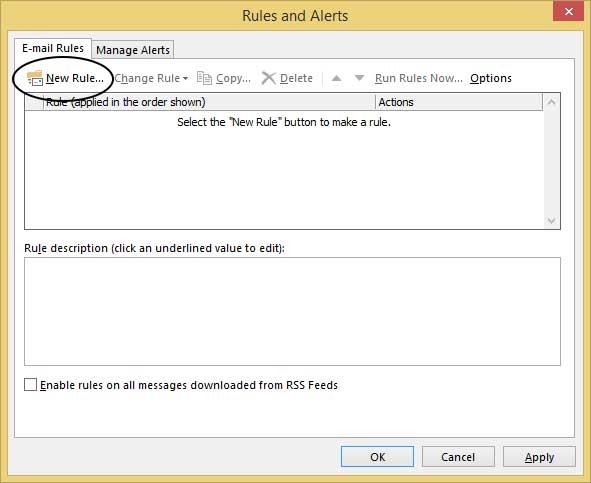
Bring up the Rules Wizard by clicking the New Rule button
That displays more pre-made rules you can apply.
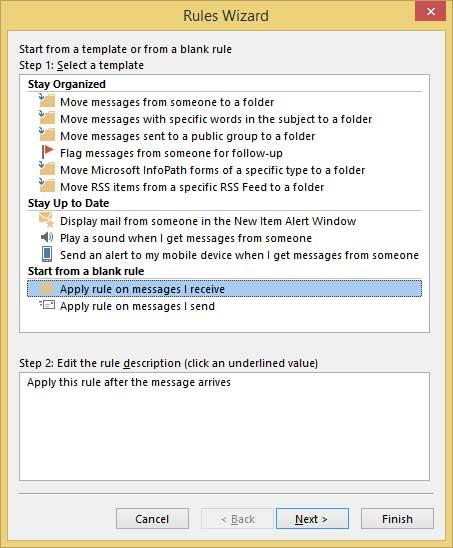
The Rules Wizard has pre-made rules, or you can choose a blank one and create one from scratch
To get to the same part of the dialog as clicking the Advanced button above, choose the second-to-last option: Apply rule on messages I receive. Then click Next, on the bottom. That brings up Step 1 of the wizard.
Check the box for specific words in the subject or body. On the bottom of the dialog, click the hyperlink for specific words.

When choosing an option in the top part of the dialog, there will be a link to click on the bottom
In the Search Text dialog that appears, type the words (v-Consult request for a Medication query ) that you want to flag, then click Add to add them to the Search list. If you add multiple items, Outlook will only grab messages where all of the items are present. Click OK when finished.

If you add more than one word or phrase, they all must be present for the message to be flagged
Click Next, and you’ll decide what to do with the messages that get flagged.
At the top, check the box for move it to the specified folder. On the bottom of the dialog, click the hyperlink for specified.

There are many actions available, and you can choose several of them, if you want
In the folder tree that appears, twirl open the Inbox, then select the subfolder where you want these messages moved.
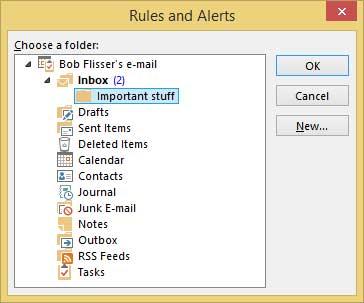
You can have the rule move a message into any folder
Click OK, then click Next to decide if you want any exceptions to the rule. Make any choices here the same way you did in the previous two steps. Of course, you don’t have to choose any exceptions if you don’t want to. Then click Next to go to the last step.
Give the rule a meaningful name (you can keep the suggested one). If you choose the Run this rule now… option, Outlook will process all messages currently in the Inbox that meet your criteria. The option for Turn on this rule will let you disable and enable the rule at any time.
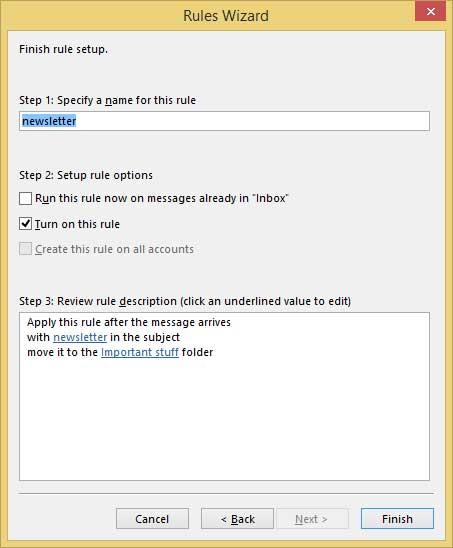
You can have a new rule run immediately, or wait for new messages to arrive
Click Finish. The rule you created will now be listed in the Rules and Alert box, and you can disable enable the rules here, without having to edit the rule. To modify the rule later, either double-click it or select it, then click Change Rule.
Click Apply, then click OK. The next time you receive a message that meets your criteria, Outlook will automatically move it into the subfolder you chose. The subfolder will be bolded, indicating that there are unread messages, and the number on it indicates how many there are.

When new messages arrive and get sorted, Outlook will indicate them
Related Articles
What functionalities are implemented on the Admin Dashboard of v-Consult?
The following functionalities are implemented on the dashboard. The Doctor/admin can View the consultation request Invite the patient for video consultation Send a prescription through SMS and Email Send advice and guidance through SMS and Email ...v-Consult User Guide for Practice Staff
v-Consult is a tool for General Practices aimed at implementing a True Triage model in general practice using online consultations. What functionalities are implemented on the Admin Dashboard of v-Consult? The following functionalities are ...v-Consult Implementation Guide
Welcome to v-Consult implementation guide for GP Practice Our v-Consult provides a mobile and web-based secure platform enabling online and video consultation solutions in dealing with all your healthcare queries. It enables healthcare professionals ...How to Add a Sender to the Safe Senders List in Microsoft Outlook (from Junk E-mail folder to Inbox)?
Add known senders to the Safe Senders list to ensure that their email will not go to your Junk E-mail folder. This feature works the same in all modern versions of Microsoft Outlook: 2010, 2013, and 2016. On the Ribbon, from the Home tab, in ...How to switch off and on the v-Consult?
Step 1: Navigate to the admin URL of your v-Consult. It will look like this https://M23456/caprihealth.net/admin/login Step 2: Enter the login credentials and click Login. From the dashboard, admin staff can perform the following actions Setting ...