Live Chat Settings
Communicate directly with customers through Live Chat.
Never miss an opportunity to make a connection. Engage your customers directly.
The 24/7 live chat service ensures the company is always available to customers. Chat transcripts and lead details are delivered via email and CRM guest cards.
Add Live Chat
- Log in to the platform.
- Scroll down to and click the Apps tab in the navigation menu, then click Live Chat.
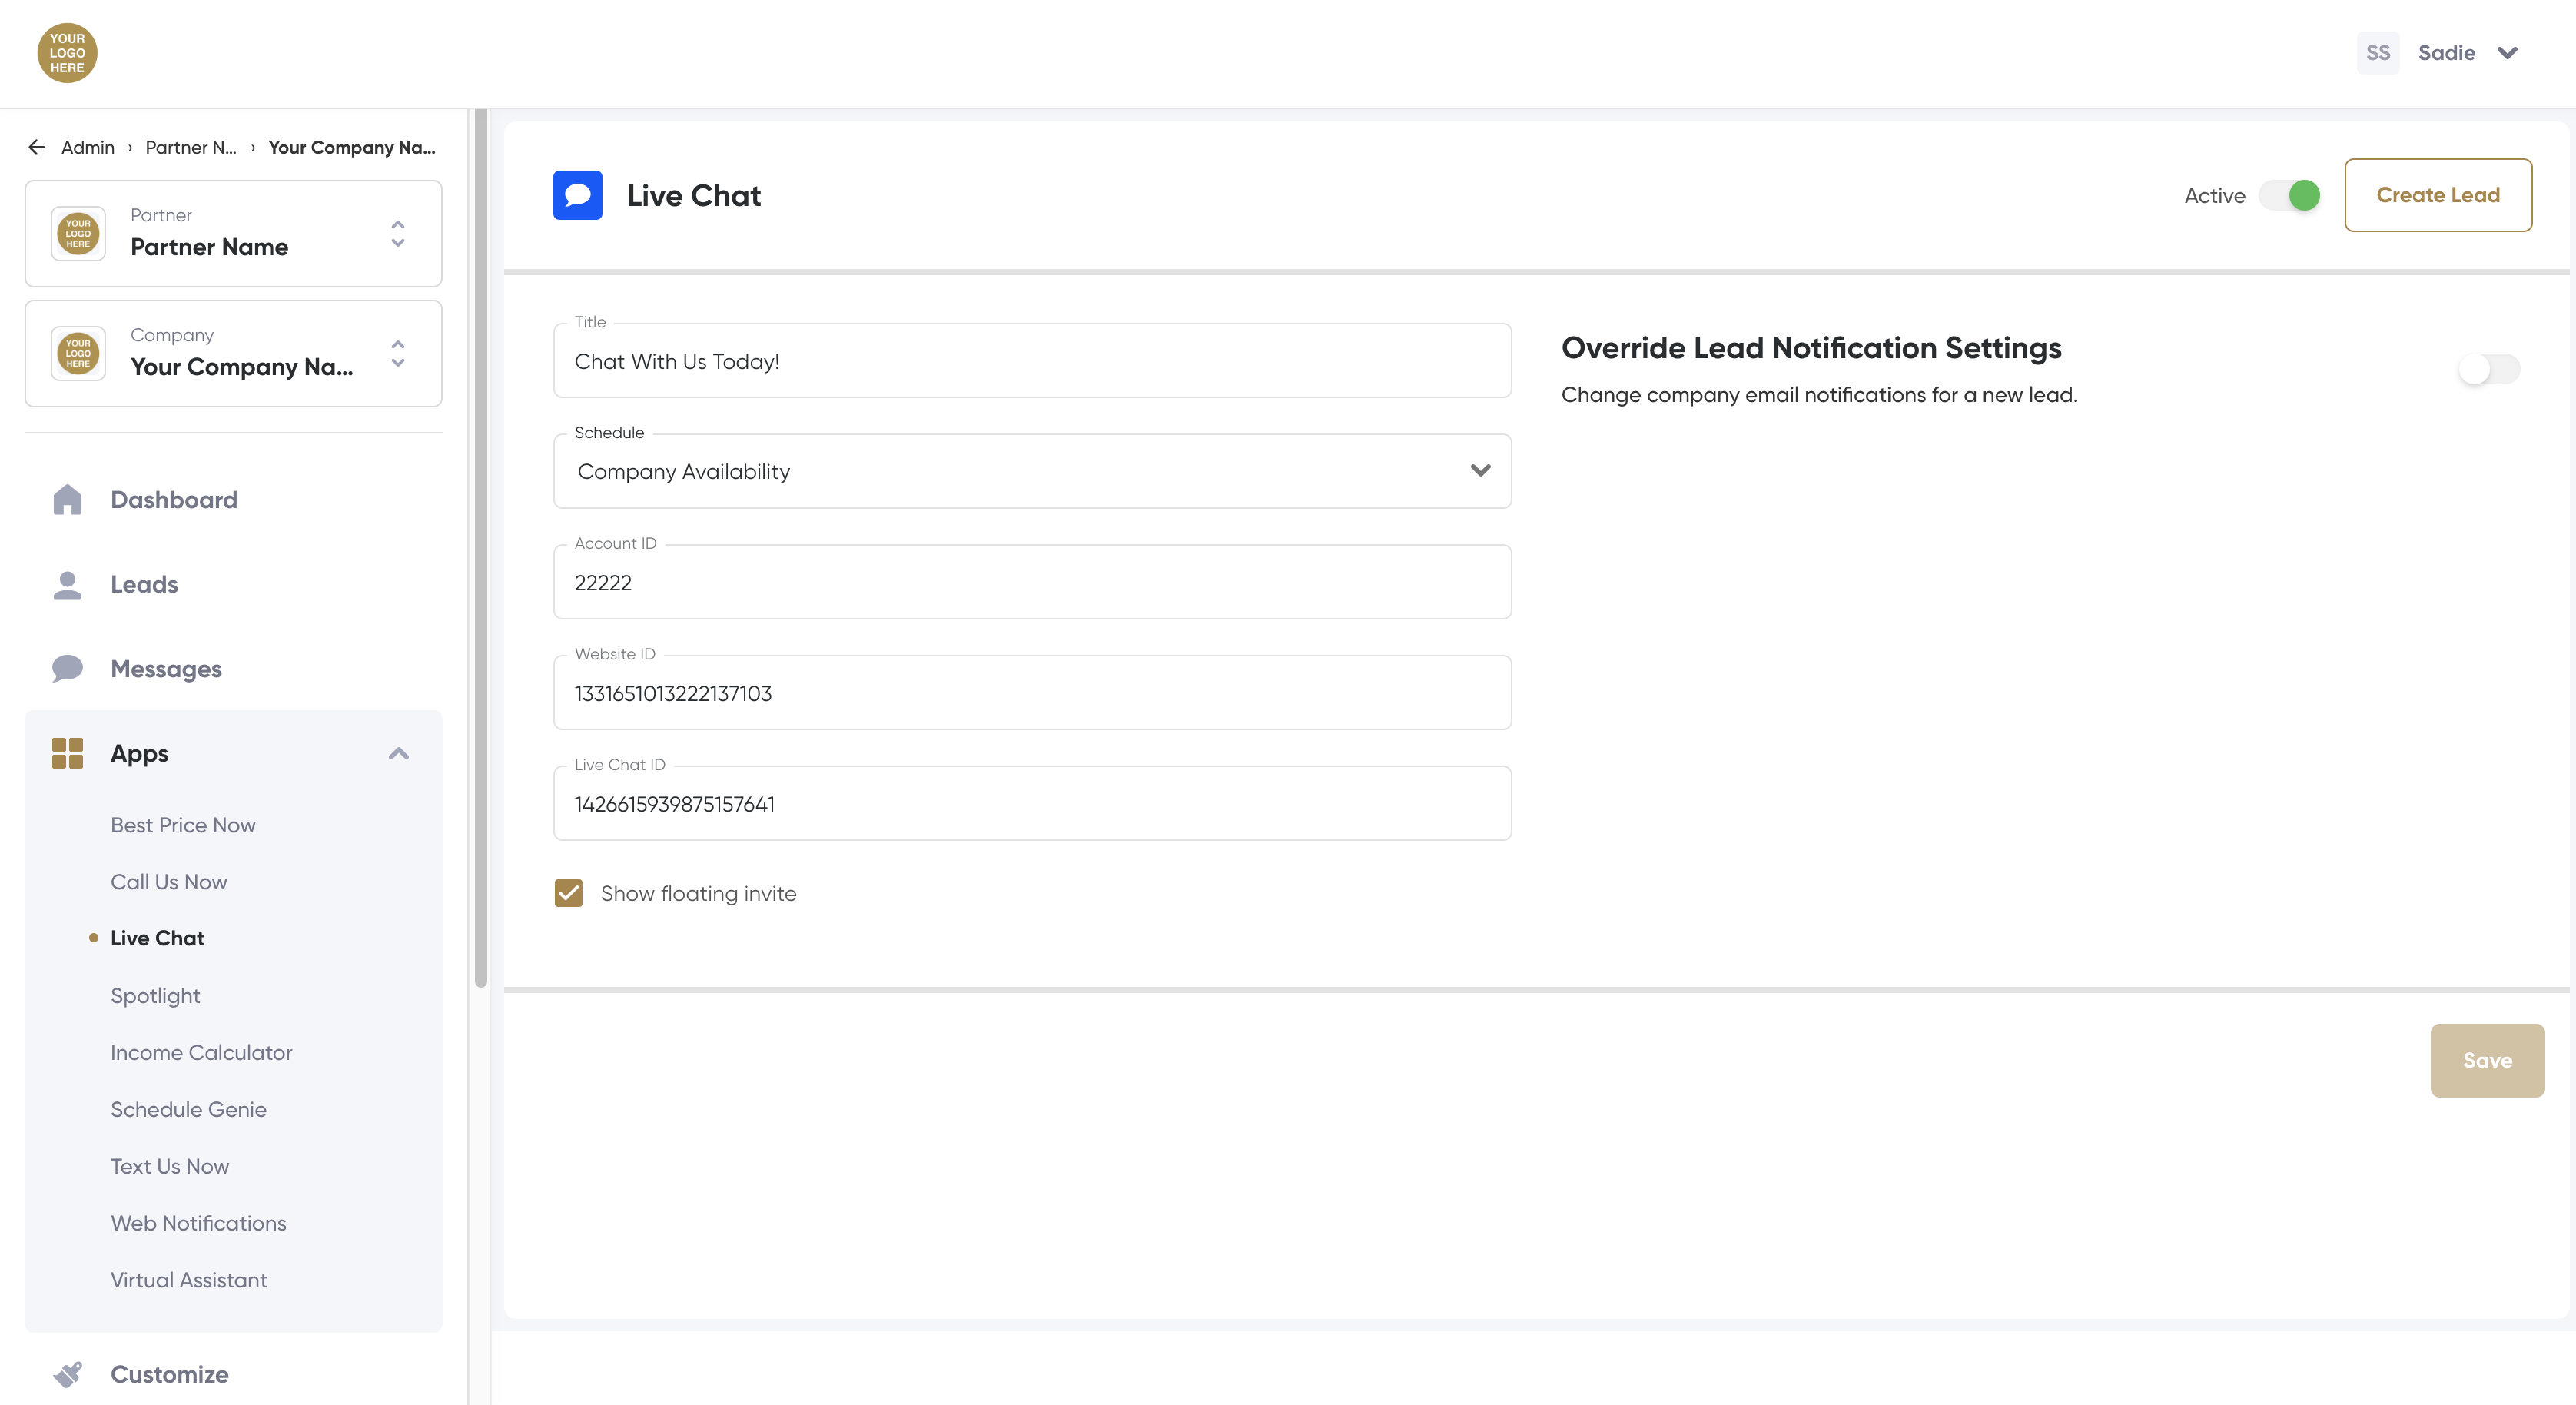
- The Live Chat page opens.
- The Live Chat settings page opens.
- Title: Call to action text displayed on the app and visible to customers.
- Schedule: A 24-hour live chat schedule will be created in Availability and assigned to the Live Chat app.
- Account ID: Do not modify. This is implemented during creation.
- Website ID: Do not modify. This is implemented during creation.
- Chat ID: Do not modify. This is implemented during creation.
- Show Floating Invite: In addition to displaying as a module within the app, checking this box will add a floating Live Chat invite that floats across the website from left to right.
- Override company lead notification settings: Check this box to change where customer data is sent when compiled during Live Chat conversations.
- Lead Notification Emails: Add email addresses that should receive customer data via HTML email.
- Reply-to Email: Type the address where customer replies are sent.
- Phone Number: The phone number that appear instead of the phone number in Company Settings.
- CRM Configuration: Select the CRM where customer data is delivered.
- Click Save.
View Live Chat Transcripts and Lead Details
If a prospect has converted to a lead via another module, for example Schedule Genie or Spotlight, and has talked with a Live Chat team member, their transcripts can be found in the Leads Calendar or Leads List. Clicking on the lead record will display the Lead Details Page where the chat transcript and details can be found.
Related Articles
Notification Settings
Never miss a lead! Choose which email addresses receive new lead notifications and select a configured CRM, LMS, or ILM to make managing leads a breeze. Receive Weekly Lead Summary Place a check in this checkbox to receive an aggregated summary of ...Notification Settings
Always be in the know with access to your company email and The Conversion Cloud™ platform. The Schedule Genie™ module informs your team of recent customer interactions via CRM/ILM integration, email, calendar, and platform notifications. The module ...Scheduling Settings & Duration
Configure your appointment application to best suit your company, industry, and customers! Number of Appointments Available per Day Choose the number of appointments or appointment time slots your team can manage each day, the number of appointments ...Text Us Now Settings
Communicate directly with customers through SMS messaging. Activate or Deactivate Text Us Now Log in to the platform. Scroll down to and click the Apps tab in the navigation menu, then click Text Us Now. The Text Us Now module settings page opens. ...Call Us Now Settings
Don't leave customers searching for a number! Provide your customers with a click-to-call option with Call Us Now. The Call Us Now module makes it effortless for customers to contact your team from any page of your website. Create a schedule to ...