Module 12 - Events in AccuCampus
Module 12: Events in AccuCampus
Topic: Events
- Advanced Options > Events Registration Settings
- Creating Seminars
- Registering for Seminar (Staff View)
- Registering for Seminar (Student View)
- Sign-in Options
- Creating Badges
- Creating Certificates
- Creating QR Codes
- Reports Available
Events
AccuCampus allows you to create, register for and track events. This allows you to track your students’ participation throughout the campus, even for one-off events. All non-course events within AccuCampus are called Seminars. Seminars can be recurring or standalone.
Advanced Options > Event Session Registration
Within this page, you are able to adjust settings for events at four different levels – Global, Location-Specific, Seminar-Specific and Session-Specific. The settings are hierarchical. To get to these settings, follow these steps.
From the Main Sidebar, hover over Advanced Options.
Click Settings.
Click Event Session Registration.
Global Settings
The global settings control all events within the system. If no other levels are changed, these settings take precedence.
Click Global Settings.
Choose if Registration for events is enabled or disabled for all events in the system. If registration is disabled, attendees will need to be manually added by an administrator with permissions.
If desired, set a Capacity for all events in the system.
If desired, set a Trainer for all events in the system.
Choose the Number of Days to Show Upcoming Events. This sets how far ahead events will display to users.
If desired, set a Reminder for events.
If desired, set how late an attendee can register to an event relative to the event date.
If desired, set how early an attendee can register to an event relative to the event date.
If desired, set how late an attendee can unregister from an event relative to the event date.
Click Save.
Location-Specific Settings
The location settings control events at a specific location. Much like the appointment settings, this refines the event settings for your specific center or department and will only apply to that location.
Search for and select a Location. Click View Location Settings.
Choose if Registration for events is allowed. There are three settings:
Use Default: causes the location to default to whatever the global setting is.
Enabled: allows users to register to events for the location.
Disabled: doesn’t allow users to register for events for the location.
If desired, set a Capacity for all events at the location.
If desired, set a Trainer for all events at the location.
If desired, set how late an attendee can register to an event relative to the event date.
If desired, set how early an attendee can register to an event relative to the event date.
If desired, set how late an attendee can unregister from an event relative to the event date.
Click Save.
Seminar-Specific Settings
The seminar-specific settings control a specific seminar.
Search for and select a Seminar. Click View Seminar Settings.
Choose if Registration for the seminar is allowed. There are three settings:
Use Default: causes the seminar to default to whatever the local and global settings are.
Enabled: allows users to register to the seminar.
Disabled: doesn’t allow users to register for the seminar.
If desired, set a Capacity for the seminar.
If desired, set a Trainer for the seminar.
If desired, set how late an attendee can register to the seminar relative to the event date.
If desired, set how early an attendee can register to the seminar relative to the event date.
If desired, set how late an attendee can unregister from the seminar relative to the event date.
Click Save.
Session-Specific Settings
The session-specific settings allow you to register users for the specific session of a seminar.
Search for and select a Seminar and a Session Date (optional). Click Find Sessions.
Search for and add a user.
Creating Seminars
The ability to create seminars is based on your permissions.
From the Main Sidebar, hover over Events.
Click Seminars.
Click Create Seminar.
Enter a Full Unique Code for the seminar. As with courses, this cannot match any other course within AccuCampus for the chosen semester.
Enter a Name for the seminar. This displays to the user when they search for the seminar.
Select the Semester when the seminar will take place.
If desired, select the College Department that the seminar will be associated with.
If desired, enter a Group for the seminar. This will associate a seminar with other seminars. This is useful for seminars with multiple sections and allows reports to be run on all of those sections without having to individually select them.
Enter Details for the seminar. We recommend entering a description of the event or important information about the event in this space. This will display to users when they search for the seminar.
Enter a Schedule. The schedule could be recurring or one-time. You can add more than one of each.
Attendance: decide how early or late an attendee will be able to sign-in /out for the seminar.
Center Attendance: decide if there is a required presence percentage in order for the attendance to count as present and if attendees are required to sign out.
Click Save.
Registering for Seminars
Depending on your permissions, you will use one of two paths to register for seminars. If you are an administrator, you may also be able to go straight to the seminar and add yourself.
Staff View
From the Main Sidebar, hover over Events.
Click Seminars.
Click Session Registration.
Search for the Seminar and the Session Date (optional). Ensure that you are selecting the event from the correct semester if it is offered more than once.
Click View Sessions. A new page will open showing the registration information for the seminar.
To add a user, search for the user and click Add User.
To remove a user, click on the minus button next to the user’s name.
Student View
From the Main Sidebar, hover over General.
Click Register to Seminars.
Choose Search Session by Date or Search Session by Event.
If searching by date, a list of all upcoming seminars will populate. It is possible to navigate within the list week by week, or search by a specific week.
Click Register next to the session that you would like to register for.
If searching by event, enter the name of the event and click Search.
A list of all upcoming sessions for that seminar will populate.
Click Register next to the session you would like to register for.
Sign-In Options
How to Sign-in (Kiosk)
Once the sign-in station is installed, users will be able to sign-in to the location either by swiping their ID cards through a card reader, or manually entering their ID numbers.
How to Sign-in (QR/Barcode Scanning)
In order to sign-in a user with a QR or Barcode, you will first need to download the AccuCampus Mobile App. This feature is only available for event tracking.
Open the AccuCampus App on your mobile device and sign-in.
Click on the menu link on the top left.
Under Seminars, click Track Attendance.
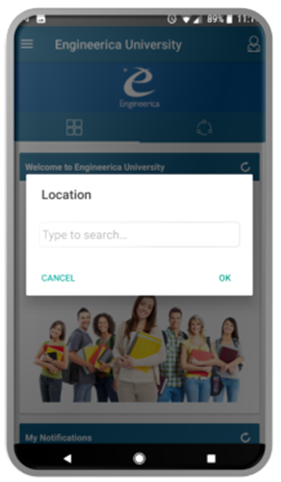
Choose the Location for the event.

Choose the Event that will be tracked.
From the event screen, you are able to sign users in or out by either scanning a QR Code or Barcode or by manually typing in their card number.
To sign a user in by entering the card number, click on the keyboard symbol and type in their card number.
To sign a user in by scanning a QR Code or Bar Code, click on the QR symbol and scan the QR or Barcode.
To change the event or the location, click on the gear symbol at the top of the screen.
How to Sign-In (Beacon)
Users can sign in to stations without having to log into a kiosk, this can be done directly from the AccuCampus app.
First open the AccuCampus app from your smartphone device. (Note: The app is available from both the Apple and Android app store)
From the app home screen, left-hand side tap on the menu bar to expand side menu. Scroll down and tap on Sign-in Station.
Once you have selected Sign-in Station a list of available stations will appear. (Note: In the upper right corner there is a 10-minute time interval for signing into a station)
Follow the onscreen prompts based on that station. A pop-up will appear asking you to confirm sign in. After you do, a message will appear on top confirming the sign-in was successful.
To sign out, go back to the Sign-in Station page. A red arrow will now appear next to the station the student is signed into. Tap on the station.
A pop-up will appear asking you to confirm the sign-out. After you do, a message will appear confirming the sign-out was successful.
Creating Badges
If your event will need name badges for your attendees, you are able to design, print and e-mail them within AccuCampus.
Templates
From this page, you are able to create and design a badge template. This is a two-step process – you will need to first create and name a badge template, and then design it. You are also able to modify an existing badge template if you need to update badges from a previous event.
From the Main Sidebar, hover over Events.
Click Badges.
Click Templates.
Click Create Badge Template. If the template has already been created, you can click Design next to the template to finish designing it.
Enter a Name and Description for the template. We recommend you make this specific so that other users will recognize it.
To design now, click Save and Design. To design the template later, click Save.
Use the Toolbox on the right-hand side of the screen to create a badge from scratch.
Click From Template to create a badge from a canned basic template form.
Select a Template from the provided options. Click Continue Editing.
Click Save once you’re finished designing your badge.
From this page, you are able to print badges for attendees. This feature generates a PDF file with all badges in one file. You can then print the file to have individual badges.
From the Main Sidebar, hover over Events.
Click Badges.
Click Print.
Select a Badge Template from the drop down menu.
Select All Users to generate the badges from that template.
Choose whether to print All Badges or to filter badges by those that have not been printed yet (Only Modified After Badges were Printed Last Time or Only Modified After).
If desired, filter the badges by User Role.
Choose to print All Badges or only badges from Specific Users. If filtering by specific users, you’ll need to select those users.
Click Generate Badges. The badges will be downloaded as a single PDF file to be printed.
From this page, you are able to create images of badges to e-mail to attendees. This feature creates individual PDF files for each badge so that they can be e-mailed.
From the Main Sidebar, hover over Events.
Click Badges.
Click E-mail.
Select a Badge Template from the drop down menu.
Select All Users to generate the badges from that template.
Choose whether to print All Badges or to filter badges by those that have not been printed yet (Only Modified After Badges were Printed Last Time or Only Modified After).
If desired, filter the badges by User Role.
Choose to print All Badges or only badges from Specific Users. If filtering by specific users, you’ll need to select those users.
Click E-mail.
Review the badges before sending them.
Click Edit Email Content to write the e-mail for the users. Remember that this e-mail will go to all of the users you selected, so be general.
Click Email Badges to send the e-mail and the badges to the users.
Creating Certificates
Templates
From this page, you are able to create and design certificates. This is a two-step process – you will need to first create and name a certificate template, and then design it. You are also able to modify an existing certificate template if you need to update certificates from a previous event.
From the Main Sidebar, hover over Events.
Click Certificates.
Click Templates.
Click Create Certificate Template. If the template has already been created, you can click Design next to the template to finish designing it.
Enter a Name and Description for the template. We recommend you make this specific so that other users will recognize it.
To design now, click Save and Design. To design the template later, click Save.
A selection of canned templates will appear.
Select a template and click Use This Template.
If desired, you can also download a Sample PDF.
To return to the list of templates, click View all Templates.
Use the Toolbox on the right-hand side of the screen to modify the template.
Click Save.
From this page, you are able to print certificates for attendees. The certificates will be downloaded as a single PDF file to be printed.
From the Main Sidebar, hover over Events.
Click Certificates.
Click Print.
Select a Certificate Template from the drop down menu.
Select All Users to generate the certificates from that template.
If desired, filter the certificates by User Role.
Choose to print All Certificates or only certificates from Specific Users. If filtering by specific users, you’ll need to select those users.
Click Generate.
From this page, you are able to create images of certificates to e-mail to attendees. The certificates will be downloaded as an individual PDF file for each badge that can then be e-mailed.
From the Main Sidebar, hover over Events.
Click Certificates.
Click E-mail.
Select a Certificate Template from the drop down menu.
Select All Users to generate the certificates from that template.
If desired, filter the certificates by User Role.
Choose to e-mail All Certificates or only certificates from Specific Users. If filtering by specific users, you’ll need to select those users.
Click E-mail.
Review the certificates before sending them.
Click Edit Email Content to write the e-mail for the users. Remember that this e-mail will go to all of the users that you selected, so be general.
Click Email Certificates to send the e-mail and the certificates to the users.
Creating QR Labels
From this page, you are able to generate a QR code for a user or group of users. The code will be unique for each user. The label can be printed or e-mailed to the user or users.
From the Main Sidebar, hover over Events.
Click QR Labels.
Search for and select a User or a Group.
Click Print.
Click View QR Labels. You can now save and e-mail the generated codes.
Reports Available
To get to the reports related to Events, from the Main Sidebar navigate to Institutional Research > Reports.
Event Registration and Attendance
This report shows the registration and the attendance for a specific event session. It can be filtered by seminar and session date.
Related Articles
How do I scan QR Codes or Barcodes for attendance tracking in AccuCampus?
NOTE: This feature is only available for tracking attendance to events. 1. Open the AccuCampus App on your mobile device and sign-in. 2. Click on the menu link on the top left. 3. Under Seminars, click Track Attendance. 4. Choose the Location for the ...How do I print badges in AccuCampus?
NOTE: Since the print function is intended to printing or just making a backup of certificates, they are created in a single file. If you would like badges in individual files, go to How do I send badges to users in AccuCampus? 1. From the Main ...How do I print certificates in AccuCampus?
NOTE: Since the print function is intended for printing or just making a backup of certificates, they are created in a single file. If you would like the certificates in individual files, go to How do I e-mail certificates in AccuCampus? 1. From the ...How do I e-mail certificates in AccuCampus?
NOTE: Since the e-mail function is intended to send individual certificates to individual users, they are created as separate PDF files. If you would like all certificates in one file, see How do I print certificates in AccuCampus? 1. From the Main ...How do I generate and view / print QR labels in AccuCampus?
1. From the Main Sidebar, hover over Events. 2. Click QR Labels. 3. Search for and select a User or a Group. 4. Click Print. 5. Click View QR Labels. You can now save and e-mail the generated codes. 6. A PDF of the QR code or codes will open. While ...