Enterprise Dispatch Module (EDM) Sample Project Walkthrough Guide
Enterprise Dispatch Module (EDM) Sample Project Walkthrough Guide
Overview
This document walks through the setup of a Sample Project in the Field2Base Enterprise Dispatch Module (EDM) software.
Reference Files & Folder Setup

NOTE: This document assumes you have already installed the latest version of the EDM software and are ready to setup your first EDM Project.
Files to Download
Here are the reference files you need to download to walk through this Sample Project Setup.
-
Sample Work Order
Filename: Sample Work Order.eform
URL: https://files.field2base.com/Sample%20Work%20Order.eform - Sample CSV File
Filename: Sample EDM CSV File.csv
URL: https://files.field2base.com/Sample%20EDM%20CSV%20File.csv
Save the Form in the Local Folder
You will need to save the Sample Form to your local Drive for use in this walkthrough:
- Save the Sample Work Order to the My Forms folder (or My Documents if Forms Designer is not installed)
Set Up Dispatches Folder
Here you will need to create a new folder on your hard drive for generating Dispatches based upon CSV files dropped into this folder by this walkthrough:
- Create a folder named “Form Dispatches” on the Local (C:) Drive
Load the Sample Work Order Form
The first step in the process is to load the Sample Work Order into the Enterprise Dispatch Module’s Forms folder.
- Go to the Enterprise Dispatch Module Program Folder in the Start Menu
- Open the EDM Project Manager
- Go to the File menu
- Select Load Forms
- Select the Form using the Windows Explorer Browser
Create the Sample Enterprise Dispatch Module Project
The next step is to actually create the Sample Project from the Sample Form provided.
- The Project Manager will open with No Project Loaded
- Go to the File Menu
- Select New
Load the eForm for the Sample Project
Now, the eForm needs to be loaded for this Project.
- The Open Form screen will appear
- Select the Sample Work Order.eform
- Click the Open Button
Configure the CSV Properties for the Project
Next you will need to tell the EDM what folder to monitor for CSV Files to dispatch Work Orders from.
- Click the CSV button in the top left to open the CSV Properties screen
- Click the Browse button or type in a file path into the File Input Directory entry box
- Browse to the Form Dispatches folder created earlier (C:\Form Dispatches)
- Click the OK button
- To confirm that the EDM is seeing the headers correctly, click the Load Sample button
- Make sure to check the First Row Contains Headers checkbox. This setting tells the EDM that the CSV you are about to load contains its Headers in the first row of the file.
- Select the CSV Sample File using the Windows Explorer Browser
- Click the Open button
- The Columns section should now look like the following:
Mapping Regions Using the Drag and Drop System
Once you have configured your CSV properties, you will have to use the drag and drop mapping system to bind Columns in the loaded form with their associated Regions.
- Click on a Column in the Mapping Window and hold your Mouse Down to select the Column
- Drag the Column with your Mouse on to the Region in the Form Viewing Window
- Release your Mouse button when the Region becomes highlighted to complete the Mapping
- Repeat this Column-Region mapping process using the following pairs:
- WorkOrderNumber – WorkOrderNumber Region
- Performed By – WorkPerformedBy Region
- CompanyName – CompanyName Region
- ContactName – ContactName Region
- Address – Address Region
- City – City Region
- State – State Region
- ZIP – ZIP Region
- PhoneNumber – PhoneNumber Region
- At the conclusion, you should see a the Mappings setup like below:
NOTE: Once a Mapping has been made, scrolling over the Region or the Column will display what the Current Mapping is and allows the Mapping to be removed using the X next to the association (as shown in the above screenshot).
User Assignment
Only one Column can be used for the User Assignment mapping. In this example, we are assigning the User based on the Performed By column.
- Drag the Performed By Column from the Mapping Window onto the User Assignment Icon
NOTE: If a User Assignment to Column mapping has been done, then a checkmark will appear on the icon and when scrolled over, the Mapping will be displayed.
Setting the Work Order Title
Next, you should specify a Region as the Work Order Title. Multiple Columns can be used for this mapping, but only one can be dragged and dropped in; additional Columns need to be typed into the textbox using the format of “{ColumnName}” from the list of Columns below.
- Drag the CompanyName Column from the Mapping Window onto the Work Order Title Icon
NOTE: If a Work Order Title has been defined, then a checkmark will appear on the icon. The Work Order Title textbox will show exactly what column(s) will be used to define the Work Order Title.
Enabling and Saving the Project
Once you have properly configured your Project, it’s time to save your work and Enable the Project.
- Save the Project by clicking the File Button, then clicking the Save button.
- Next, enable your project by clicking the Project Disabled button.
- This should toggle the Project to an Enabled state, as shown below.
- Enabling the Project means that this Project will be loaded the next time the EDM Service is started or restarted.
- Go to the File Menu
- Click the Save button
Set Up Users with the EDM Administrator Utility
Next you will need to set up Users through the EDM Admin in order for Dispatches to be assigned to the correct Users. To set up the Users in your EDM, Please do the following:
1. Open up the EDM Admin Utility
2. Navigate to the Users tab
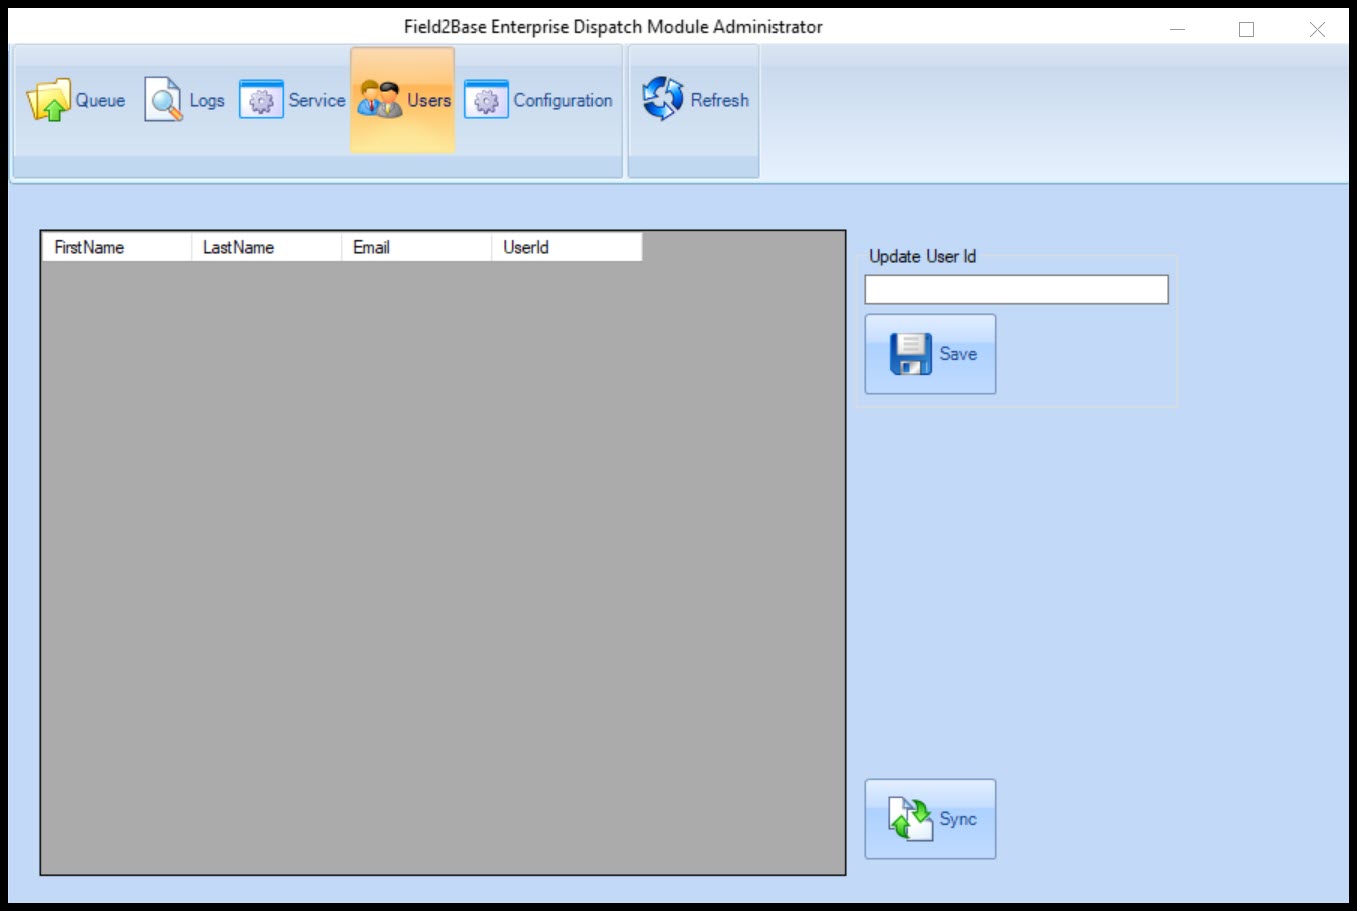
3. Click the Sync button in the lower right of the Users Manager tab
NOTE: While you are syncing Users, it may look like the EDM Admin stopped responding. This is normal and the screen will be updated momentarily.
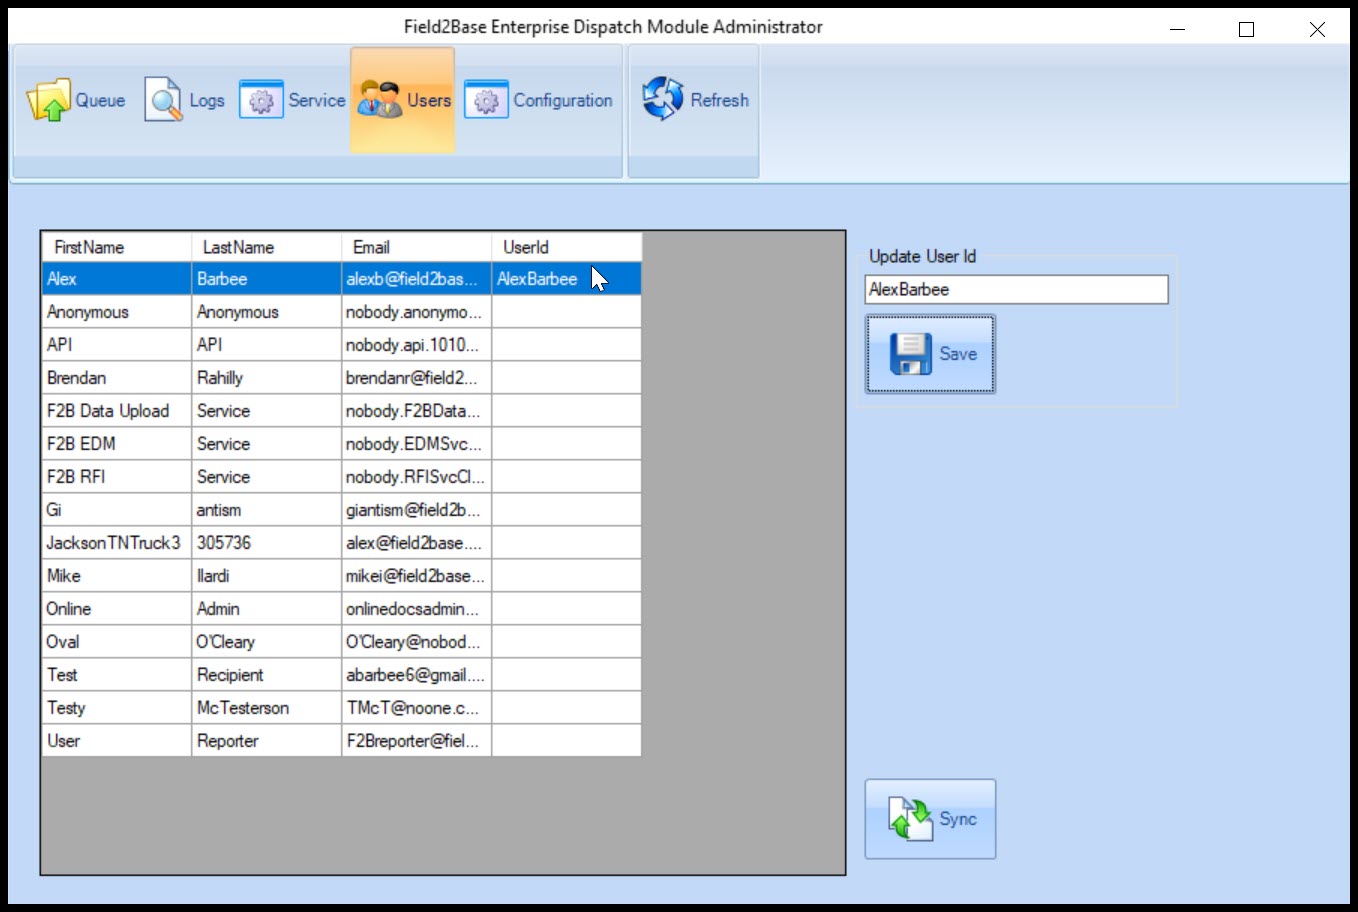
Once the Sync is completed the Users section will have a populated table:
4. Click on one of the Users you just synchronized to highlight their listing
5. Each time you highlight a User, use the Update User Id field to the right of the list to update the User ID beside the listing so that it matches the User's Username in the Field2Base Admin Portal.
6. Once you have entered each Username/UserId click the Save Button to save the changes.

7. The table will now show the updated User Mapping just completed
Note: Each row in the sample CSV file signifies a single Work Order Dispatch. Because we're using the Performed By column in the CSV to dictate User Assignment, be sure that the User Id in the Performed By column matches the UserIds for each User in the Users section of the EDM Admin.
Starting the Service and Dispatching Work Orders
For the EDM to begin processing, you must now start the EDM Service. This can easily be done through the EDM Admin Utility.
- In the already opened EDM Admin, navigate to the Service Manager tab
- Click the Start Button.
- Copy the CSV File (Sample EDM CSV File.csv) into the Input Folder (C:\Form Dispatches)
To make sure the EDM has been set up correctly, please check the Admin’s logs section to confirm proper functionality. To do this, follow the directions below.
- Open the EDM Administrator
- Click on the Logs section
Look at the logs to verify that the Work Order is being processed correctly.
In this case, the logs should resemble the following snippet:
- 08/24 05:22:15.20 PM -4 Info : EDM Service Started
- 08/24 05:22:15.53 PM -4 Info : Loaded project Sample Work Order.
- 08/24 05:22:15.58 PM -4 Info : Begin scheduled project thread
- 08/24 05:22:15.61 PM -4 Info : Exiting scheduler thread because there are no projects that use scheduling.
- 08/24 05:22:15.67 PM -4 Info : Begin retry thread
- 08/24 05:23:15.44 PM -4 Info : Received PreFill Test Co.
- 08/24 05:23:15.70 PM -4 Info : Assigned ID 1
- 08/24 05:23:17.78 PM -4 Info : PreFill submitted successfully | PreFill Key: 045db7fb-586e-4862-8957-249c89e7d0a5
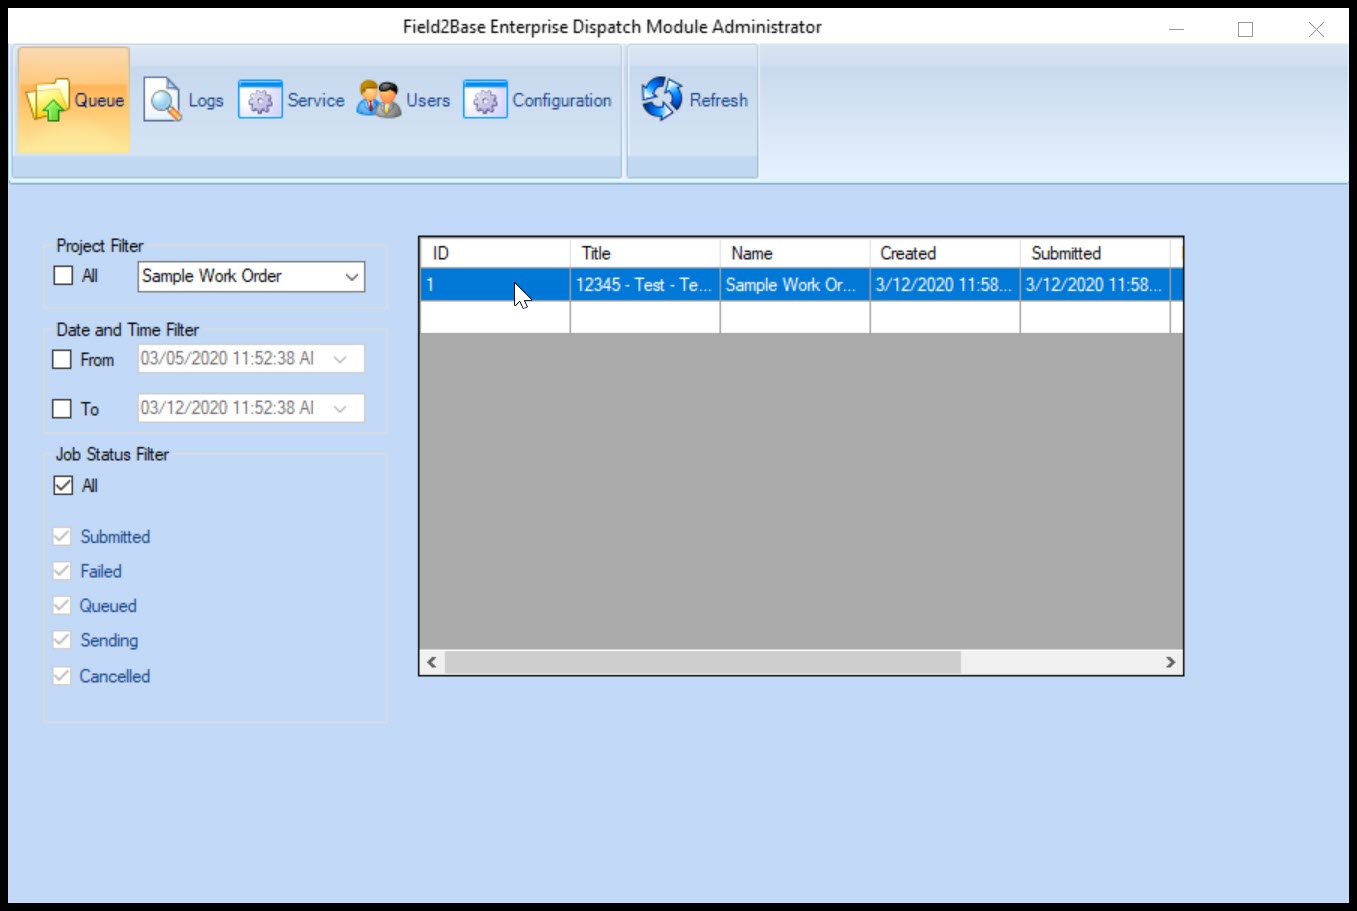
Check the Queue section to verify that the Work Order(s) sent is being or has been processed.
Popular Articles
Forms Designer Quick Start Guide
Overview Field2Base Forms Designer is the proprietary software application that allows your existing paper forms to be quickly converted to a smart E-form available to your end users via our mobile and web-based Mobile Forms applications. This ...Portal 11.28.2023 Release Notes
Overview Our release notes offer brief descriptions of product enhancements and bug fixes. We include links to the current articles for any affected features. Those articles will be updated shortly after the Portal release to include new ...Integration Service Configuration Guide
How To Configure Integration Services To Allow Read/Write Access on a Network Path All of our Integration Products, including the DIM, DUU, and EDM have respective Windows Services responsible for communicating with our server. Occassionally, ...Data Integration Module (DIM) Migration Guide
Overview This article provides the information necessary to migrate the Field2Base Data Integration Module (DIM) over from one server to another. Please refer to the DIM Install Guide for the initial installation of the Field2Base DIM. Once that's ...How to Check the Version of Integration Products Running on a Windows 10 Machine
Right-click on the Start menu button. Click on Apps & Features. In the Apps & Features search bar type in the Integration Product you are looking for, eg. F2B Data Integration Module, F2B Data Upload, or F2B Enterprise Dispatch Module. Click to ...