Blue screen "HDMI 1 no signal"
Step 1: Check Projector Source
Ensure that the projector is set to the correct source:
Press the "HDMI 1" button on the top of the projector's remote to select HDMI 1 as the source. If there's no response, try selecting HDMI 2 instead.
Step 2: Activate Lü System
Using the Lü remote, press repeatedly on the spacebar for 5-10 seconds until the screen turns on. The Dell logo should appear on the screen.
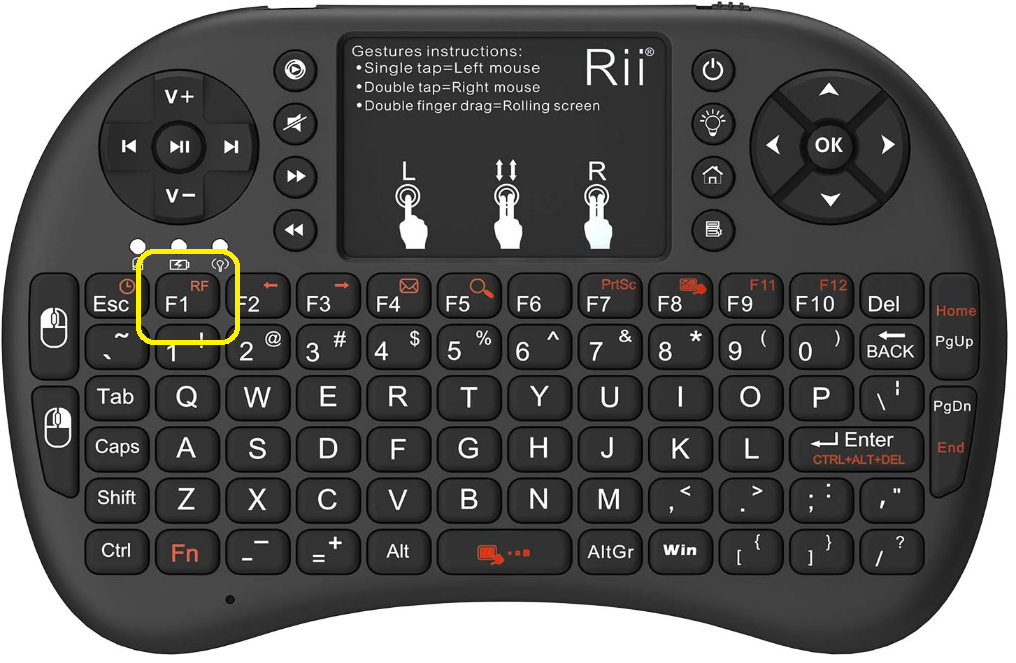
Step 3: Re-sync Lü Remote
1. Turn off the Lü remote.
2. Hold the "F1" key.
3. While holding "F1," turn the remote back on, then release the "F1" key.
This action should sync the remote back to the Lü system. The amber light will start blinking faster but should stop after a few seconds when the remote is synchronized.
Step 4: Reset Lü System
1. Turn off the projector.
2. Locate the breaker to which the Lü system is connected.
3. Switch off the breaker and leave it off for 4 to 5 minutes.
4. After the designated time, turn the breaker back on.
5. Go back to your Lü and turn the projector on again.
This process may help reset the system and resolve any persistent issue

The Möbil is excluded from Step 4 but you can disconnect the power cable from the unit.
Step 5: Press the power button and check the HDMI cable
If you still have no image on the screen, please follow these steps depending on your generation of Lü system:
- Lü 2nd generation :
1. Open the heart's cover by removing the single screw.2. Press the power button of the computer located in the bottom left of the heart.
3. While accessing the heart, try disconnecting and reconnecting the HDMI cable for a few seconds.
1. Open the heart's cover by removing the single screw.
2. Press the power button of the computer located in the bottom left of the heart.
3. While accessing the heart, try disconnecting and reconnecting the HDMI cable for a few seconds.
- Lü 1st generation :
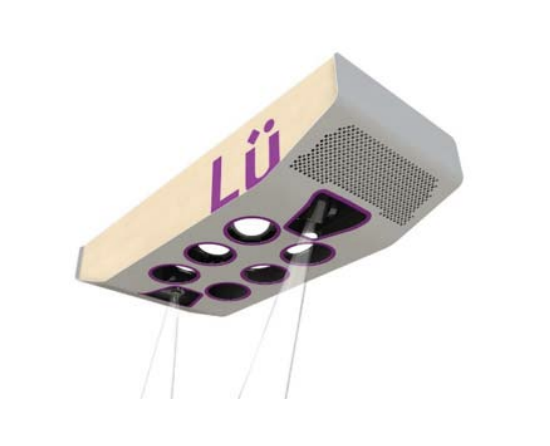
1. Access the computer located atop the Lü in the light and sound module, potentially requiring a lift.2. Press the power button, wait a minute, then press it again.3. Disconnect and reconnect the HDMI cable from the computer. You can also try a another HDMI port.
1. Access the computer located atop the Lü in the light and sound module, potentially requiring a lift.
2. Press the power button, wait a minute, then press it again.
3. Disconnect and reconnect the HDMI cable from the computer. You can also try a another HDMI port.
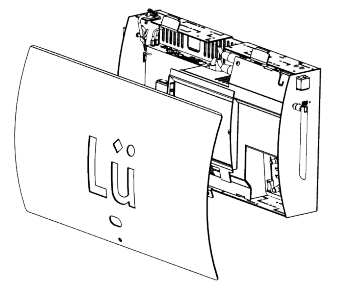
Möbil :
1. Turn off the projector.
2. Remove the back cover by unscrewing the six screws.
3. Press the power button on the computer.
4. Disconnect and reconnect the HDMI cable from the computer. You can also try another HDMI port.
If the
problem persists, please contact Lü Support Team : support@play-lu.com or Toll Free 1-855-781-0797
Related Articles
Project the image from my phone or computer onto the projector
If you have the 2nd generation Lü, Reflector Teacher is already installed and ready to be used on the computer. For any questions about Teacher Reflector, visit their help center: https://help.reflectorapp.com/support/home or take a look at this ...Lü 1st generation - Change the image ratio
If any part of the screen does not display correctly in the projection, the aspect ratio may have been accidentally changed. To change the image ratio and thus have a full screen, press the Aspect button using the projector remote control and choose ...If your Lü is not turning on
We strongly recommend that you leave the computer on at all times, 24 hours a day, 7 days a week. If you are here, it's probably because you have a blue screen with an HDMI 1 no signal message. It means that Lü's computer is turned off. Here are ...Change the color of the projector image
We recommend this article for IT members of schools or districts. If the color of your projector seems to have changed, press the Color Mode button using the projector remote control. We recommend that you select the Dynamic mode. Press the “Color ...Düo connection not possible
We recommend this article for IT members of schools or districts. The DÜO connection requires that the two computers are connected to the same network. They must be able to ping each other. Press the "WIN" key on the keyboard to open the Windows ...