For Promoters: How Do I Set Up And Run Live Timing?
Live timing is crucial. We designed a system for reliability and ease of use.
Overview
It's pretty simple. In short, set up the equipment, set up your event in RaceReady (here's an article that shows how) , build the race order (some do this before registrations are complete, and other do it afterward), and then turn on each moto when that moto's gate is dropped and turn it off when the last racer crosses the finish line for the final time.
You'll need your truss gantry set up over your finish line, and you'll have to attach the antennas overhead and run their cables to the RFID Electronics Hub which should be positioned near the base of the truss gantry. Connect the four antennas to the receiver, connect reliable and steady power to the unit (POWER THE UNIT ON AT LEAST AN HOUR BEFORE PRACTICE BEGINS), turn it on at the power strip, and make sure the riders have RFID stickers under their visors properly applied. The rest is done on your computer, which needs to be connected to the internet.
If you have a cellular + wifi antenna unit, attach it as high as possible on the gantry using zip ties attached to the cables, and attach the LTE cables to the WAN ports on your router (the black "Digi" unit inside the RFID Hub). Also attach the 2.4 cables to the WIFI ports on the router. If you get this wrong, you won't have an internet connection.
Software
Make sure Riders register for the race. If no riders register, then our system won't allow you to create a race order and start timing riders...for obvious reasons.
If you need help getting riders to register, point them to this article that explains how to register for an event.
2. Access the event within your promoter account (Dashboard>event menu>manage race):
3. Build your race order quickly and easily with RaceReady's builder. Click on the Race Order tab, and you'll see the classes on the left and the races on the right. Click and drag classes into any races you wish. Multiple classes can be combined in any single race, but the RaceReady system will alert you of any conflicts as you build. It will look like this:
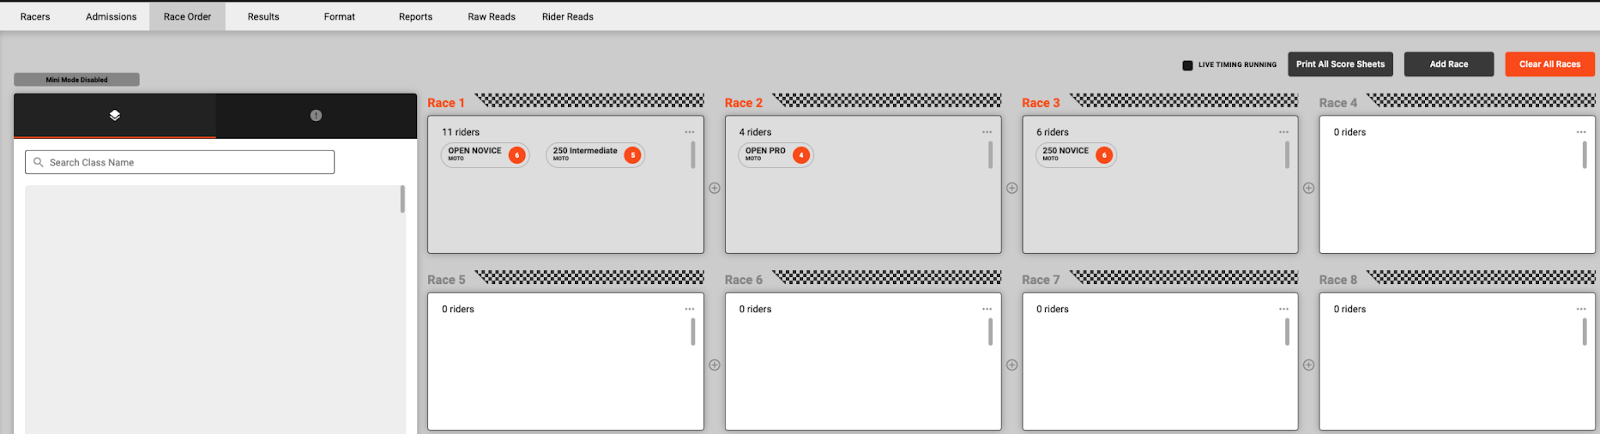
5. Once your race order is built, you're ready to run live timing. On the top right of the Race Management dashboard, select the three dot menu icon and select "Live Timing":
Here's what you'll see:
The section on the left allows you to select a race to control, and you can select a moto for that race and start/stop/restart timing from there. A green icon next to the race indicates whether any timing has been recorded for that race.
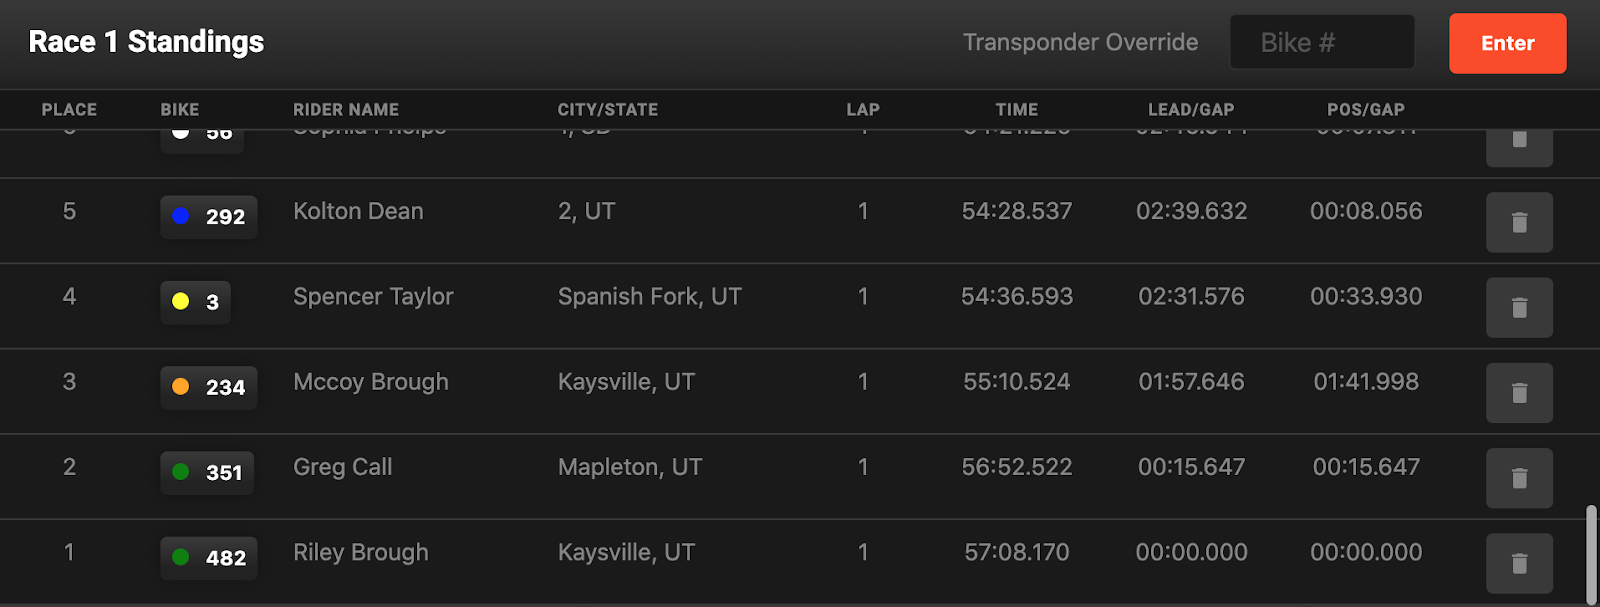
If you detect that someone failed to register in the RFID system (perhaps they lost their transponder, or otherwise compromised it), you can manually enter them using the Transponder Override in the top right corner of this section.
You might use this if a registered racer uses a different helmet with no transponder, and you figure that out as the race progresses. You can enter their bike number right away for the amount of laps they have completed thus far, then enter them as they cross the finish line each time until the race is over.
When it's time to stop each race (prior to beginning the next race), select "Stop" in the left hand section, or "Next". You can also restart the race if necessary, though this should be rare. RESTARTING THE RACE WILL DELETE ALL RESULTS IN THAT RACE so don't just go pushing that button unless you really need to.
Select your next race before any of its riders cross the finish line for the first time, and start it.
Related Articles
For Promoters: Unpacking and Testing Your Live Timing Equipment
Your new live timing equipment should come in two main boxes (besides the gantry, if applicable). The RFID Electronics Hub This includes a rack case with electronic components inside: 1. RFID Reader with t antenna ports, with small 12" extension ...For Promoters: Troubleshooting Your RFID Live Timing System
Here are some common mistakes that can mess up your live timing system. RFID technology is very reliable. That's why it's used in city infrastructure all over the globe, besides many other uses. But here are things you can do to mess up the RFID ...For Promoters: Timing Equipment Diagrams
A picture's worth a thousand words. Here's how to set up your equipment. RFID Equipment Diagram The diagram for the RFID Electronics Hub, as internally connected, is below: Truss Fixture Diagram In general, finish lines range from 16' to 24' wide. ...For Promoters: How to Tear Down, Store, and Transport Live Timing Equipment
Our live timing and internet equipment was designed to be rugged, but it needs to be cared for properly. Promoters are responsible for taking care of it during their contract. The basic steps to tear down the live timing equipment are: 1. Power ...For Promoters: How Can I Get Live Timing For My Events?
The other stuff is nice, but seriously Live Timing is where it's at. RaceReady offers a way for any promoter out there to use live timing. And no, there's not a huge up-front cost. In fact, for promoters who qualify, there's no upfront cost at all. ...