How Do I Create a New Study?
DIRECTIONS
1. There are several ways to create a new study from the Studies menu:
- press New,
- right-click anywhere on the Studies list and select New Study, or
- press CTRL+N.
2. When the "Select Study Design" dialog box is opened, select the Study Module, the Specific Template, and the GLP Preset.
Note: Specific Templates can be created at the Study Templates page, which can be found on the side menu from the Studies page.
3. In the General Tab, fill out the fields to designate the Study Number, Study Type, Info, etc.
4. Assign the study dates, such as Study Begins, Dosing Begins, Dosing Ends, Study Ends, and the Initial Animal Distribution Date in the side menu.
4. Assign the study dates, such as Study Begins, Dosing Begins, Dosing Ends, Study Ends, and the Initial Animal Distribution Date in the side menu.
5. In the Personnel Tab, click Assign Personnel to assign users to specific roles in the study.
Then, in the Assign Personnel window, choose which roles to assign each user by using the drop-down list at the top.
6. Once you've added personnel, return to the Personnel Tab and click Add Departments. From this window, complete the same steps to assign users to departments.
7. In the Animals Tab, click on Add Order to add a new animal order and assign a tracking or PO number to the order(s). Fill out the other fields as necessary.
8. Once you've added an animal order, return to the Animals Tab and click on Add Animals.
Choose which order to add the animals to by selecting one from the drop-down menu.
Then,
specify the quantity of animals of each sex to add. If desired, you can
edit the numbering rules for the Animal IDs and Temp IDs by pressing Numbering Rule Animal ID and Numbering Rule Temp ID, respectively.
Note: Use Copy Order to duplicate an existing order.
9. Once you've added animals, you can Create Cages, edit any of the columns by pressing Change Animal's Field and selecting the column(s) desired, and fill in any other required information in the fields under the Animal Order Details tab.
10. In the Groups Tab, click on Add Groups.
Specify the number of groups to add and how many males and females will be in each group.
If there are different species or strains in the group(s) you can specify this, and add further details by using the drop-down lists provided.
Note: use Copy Group and/or Copy Group Settings to duplicate an existing group, or copy settings from an existing group into another.
11. Assign animals to the groups by returning to the Groups Tab, clicking on one or more animals, and then pressing Assign Animals to Group. Alternatively, click on one or more animals, right-click, and select Assign Animals to Group.
12. In the Treatments Tab, click Add Article.
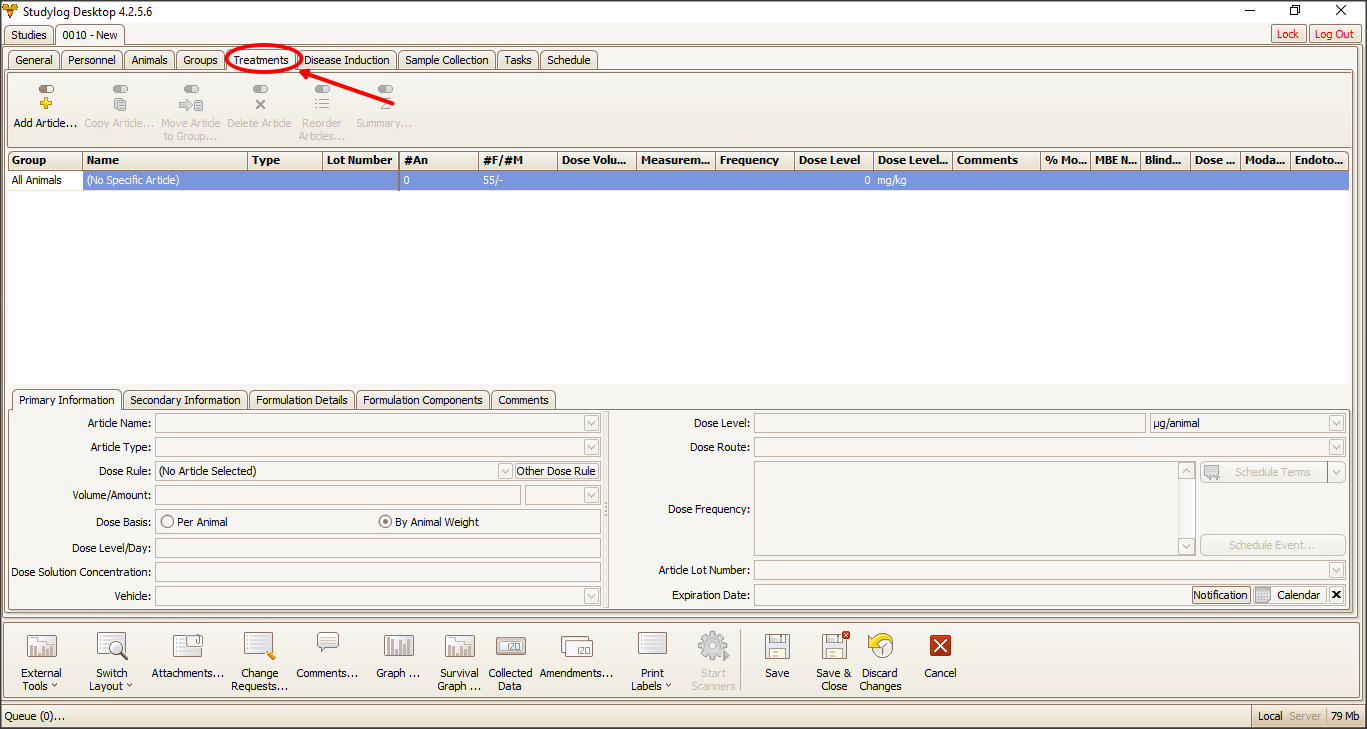
Select the article type, give it a name, and assign it to one or more groups.
Then, in the tabs below, fill in primary and secondary information, specify the formulation components, and add any other necessary details.
Then, in the tabs below, fill in primary and secondary information, specify the formulation components, and add any other necessary details.
Note: You can use Copy Article to apply an existing article to other groups.
13. In the Disease Induction Tab, click Add Disease.
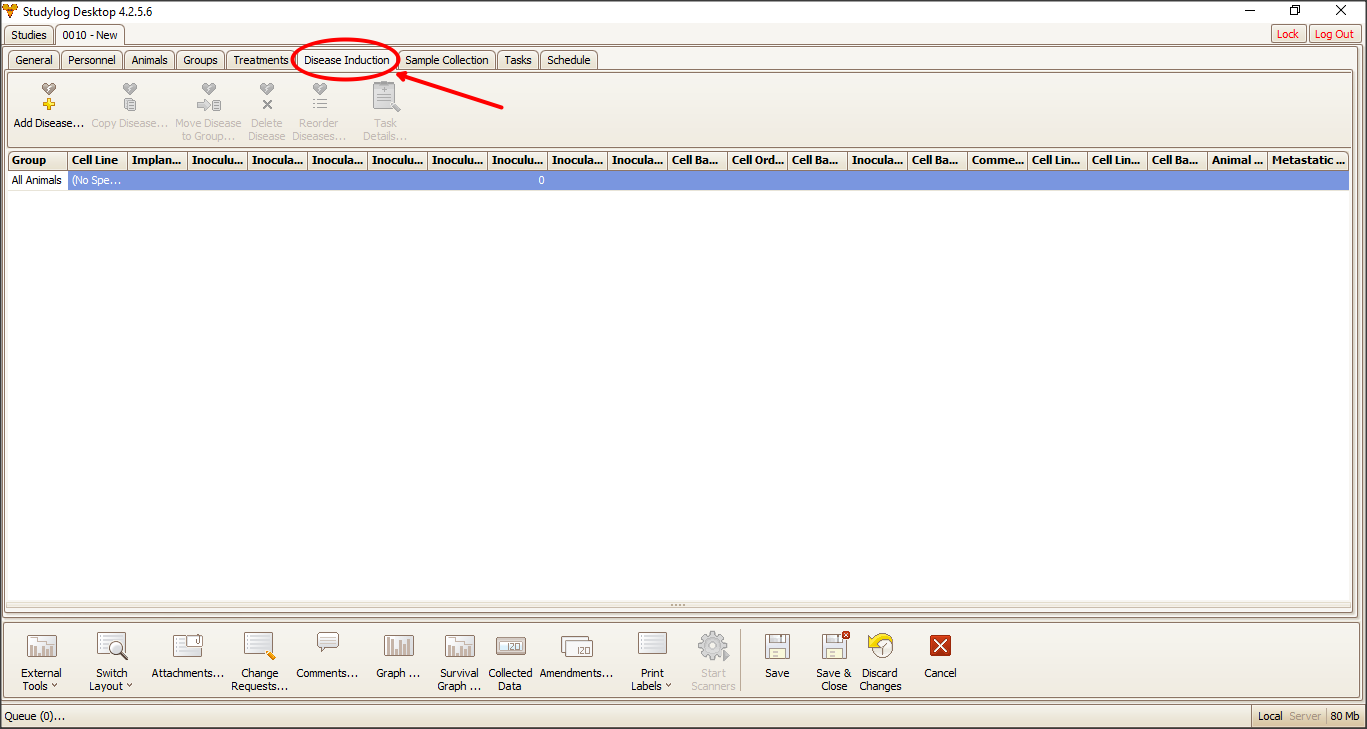
Select the induction type, give it a name, and assign it to one or more groups.
Then,
in the tabs below, fill in primary and secondary information, specify
the components, the hormone, and any other necessary details.
Note: You can use Copy Disease to copy a disease from one group to another, or Move Disease to move a disease from one group to another.
14. In the Sample Collection tab, click Add Task.
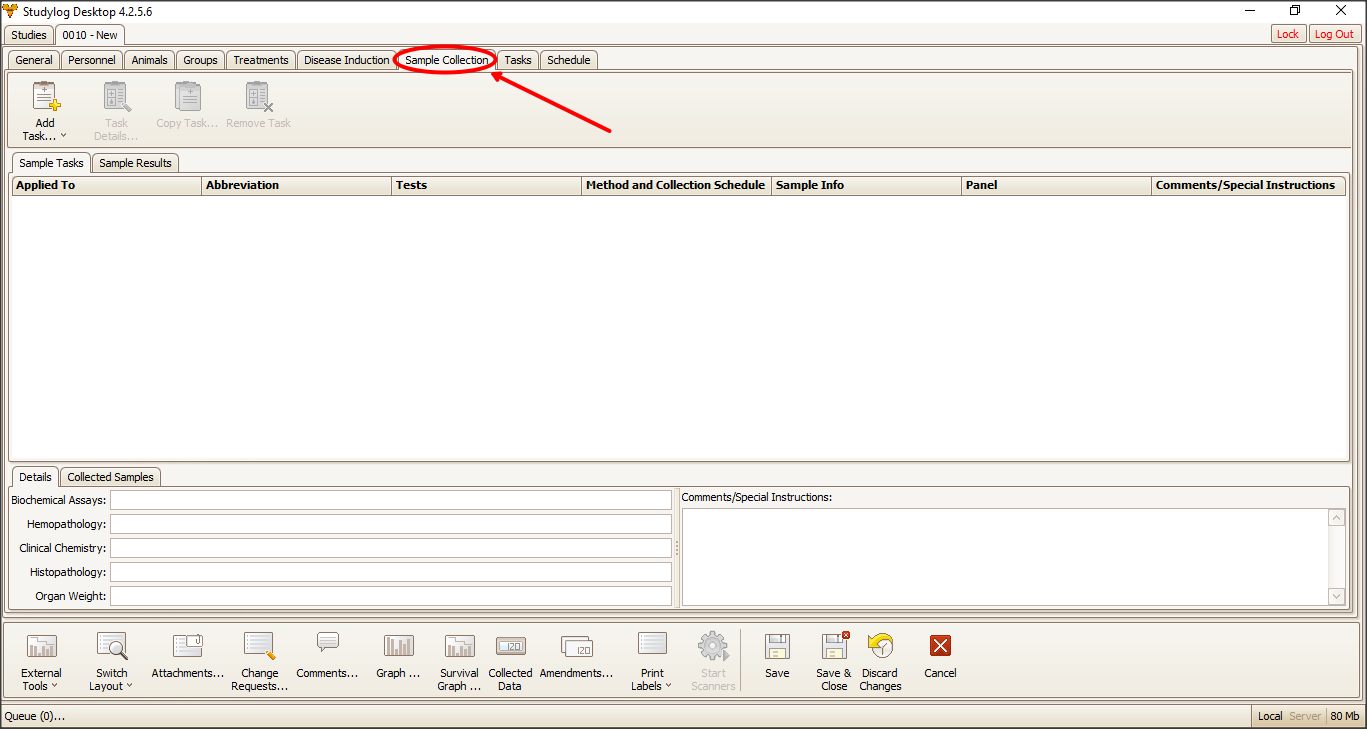
Select whether you want a Sample Collection task or a Sample Results task.
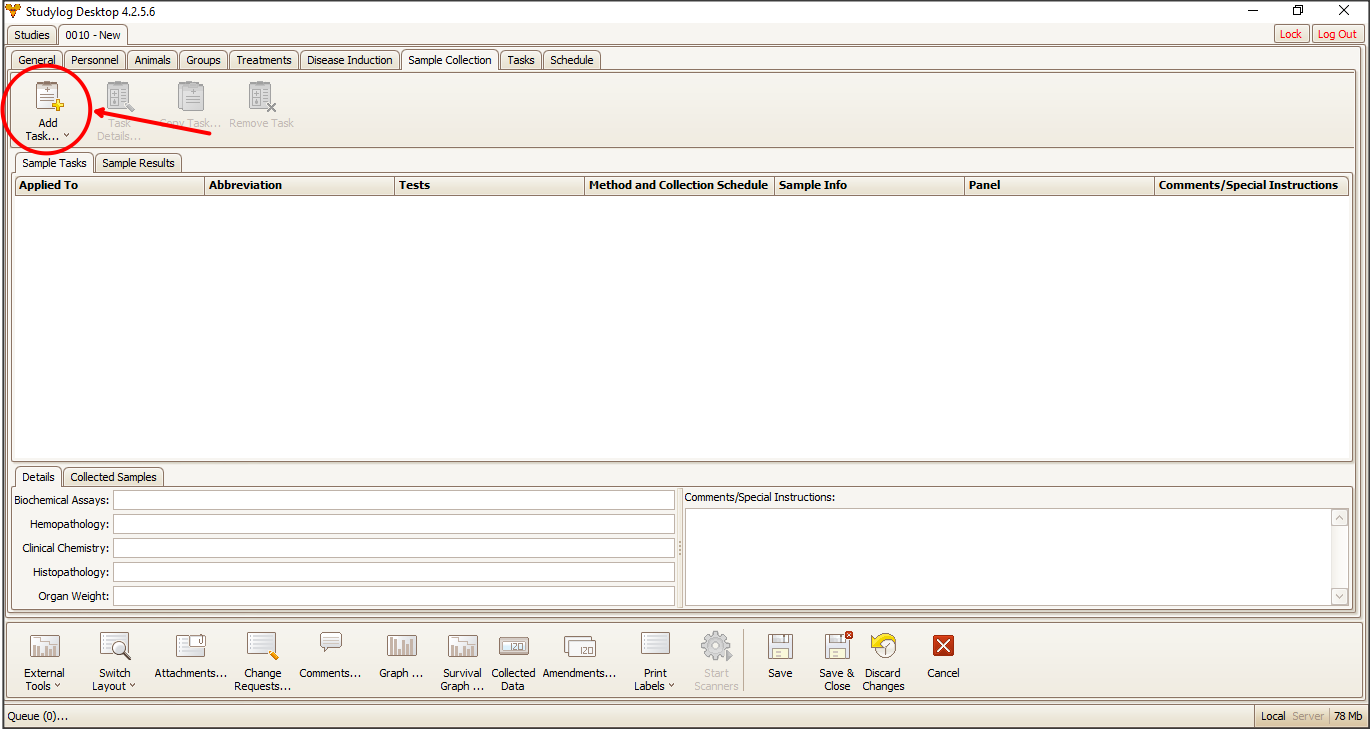
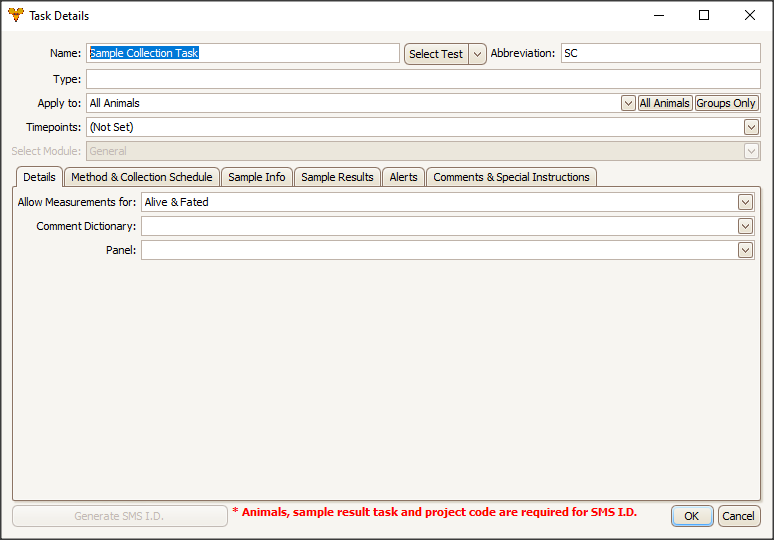
Select the task type, give it a name, and assign it to one or more groups. In the Details Tab, specify which animal fate types to allow measurements for. (For instance, some samples may be need to be collected from fated animals.) In the other tabs, you can enter the collection method, the schedule, alerts and any specific instructions for collecting a sample.
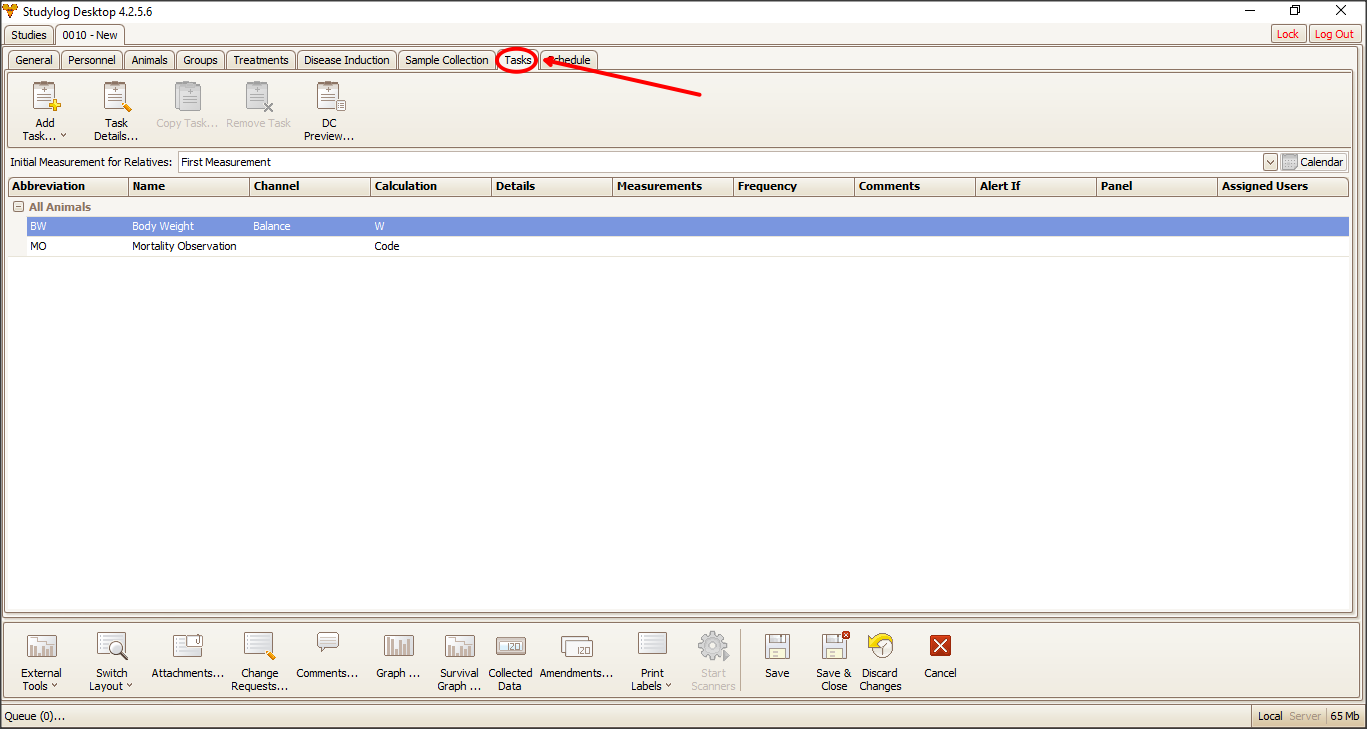
15. In the Tasks Tab, click Add Task. Select the task type you want and continue.
Select whether you want a Sample Collection task or a Sample Results task.
Select the task type, give it a name, and assign it to one or more groups. In the Details Tab, specify which animal fate types to allow measurements for. (For instance, some samples may be need to be collected from fated animals.) In the other tabs, you can enter the collection method, the schedule, alerts and any specific instructions for collecting a sample.
15. In the Tasks Tab, click Add Task. Select the task type you want and continue.
Type in the task's name, and assign it to one or more groups.In the Details Tab, specify which animal fate types to allow measurements for. In the other tabs, you can enter the field types to be included, the collection method, the schedule, alerts and any specific instructions for collecting a sample. Depending on the type of task you selected, certain tabs may or may not be available in this window.
Note: The default measurements are Body Weight and Mortality
Observations.
16. In the Schedule Tab, click the Schedule Tasks/Measurements.
Specify the task and the animals to which the event is assigned, as well as the users and dates. There are also options for scheduling recurring events, as well as setting the collection time, if applicable. When you are finished, the event(s) will appear on the calendar.
Note: The Schedule Tasks/Measurements window also can be reached through the Sample Collection Tab or the Tasks Tab: [Add Task] > Task Details > Method and Collection Schedule/Frequency > [Schedule Tasks/Measurements].
With all of these steps completed, your new study is complete.
Related Articles
How Do I Create Study Templates?
The Study Templates section can be found on the Studylog Main Menu. It contains customizable templates for studies so that the user can specify alternative settings for a study’s layout, content, and more. The Study Templates menu looks a lot like ...How to Use Switch Layout During Study Creation
There is an easier way to view the contents of each tab in the Study Creation menu. By default, the contents of the Study Creation menu are displayed in a Detailed format, but there is also a Simple format available. Here’s how to access it: 1. In ...How to Create a Report That Lists All Studies
Studylog includes a report format that lists all of the studies in the database. This report can be printed and shared. Here’s how to do this: 1. Open the Reports Manager and then select the format Study List. 2. In the Studies drop-down menu, check ...How to Use the Change Study Session Date Tool
Sometimes, you might want to change the date of a particular Data Collection session, such as if you accidentally collected data on the wrong date. Or perhaps you need to erase an entire session which had been entered in error. The administrative ...How to Narrow Study Searches with Filters
The Study Database Search function found on the left-hand side of the Studies menu, is a search bar that allows you to enter a numerical or text value so that all of the studies containing your query in any of their columns will be displayed. You can ...